")


There are certain flavours that instantly transport you back to childhood, and for me, the sweet, tangy, and creamy combination of orange and vanilla is pure nostalgic bliss. It conjures up images of hot summer days, chasing the ice cream truck, and the simple joy of a melting Creamsicle bar. I wanted to capture that exact feeling in a dessert that was both elegant enough for guests and easy enough for a weeknight treat. When I first made this Silky Orange Creamsicle Pie, the reaction was immediate and unanimous: pure delight. My kids, usually picky about new desserts, devoured their slices, their faces mirroring that same childhood joy I remembered. My partner, a self-proclaimed dessert connoisseur, declared it one of the best no-bake pies he’d ever had, praising its incredibly smooth texture and perfectly balanced orange-vanilla flavour. It wasn’t too sweet, wasn’t too tart – just a dreamy, cloud-like slice of sunshine. It’s since become a staple in our house, especially during warmer months, because it delivers that refreshing creamsicle taste without needing to turn on the oven. It’s simple to make, looks stunning, and tastes even better. This recipe isn’t just about making a pie; it’s about recreating a cherished memory on a plate.
Silky Orange Creamsicle Pie: The Ultimate No-Bake Dream
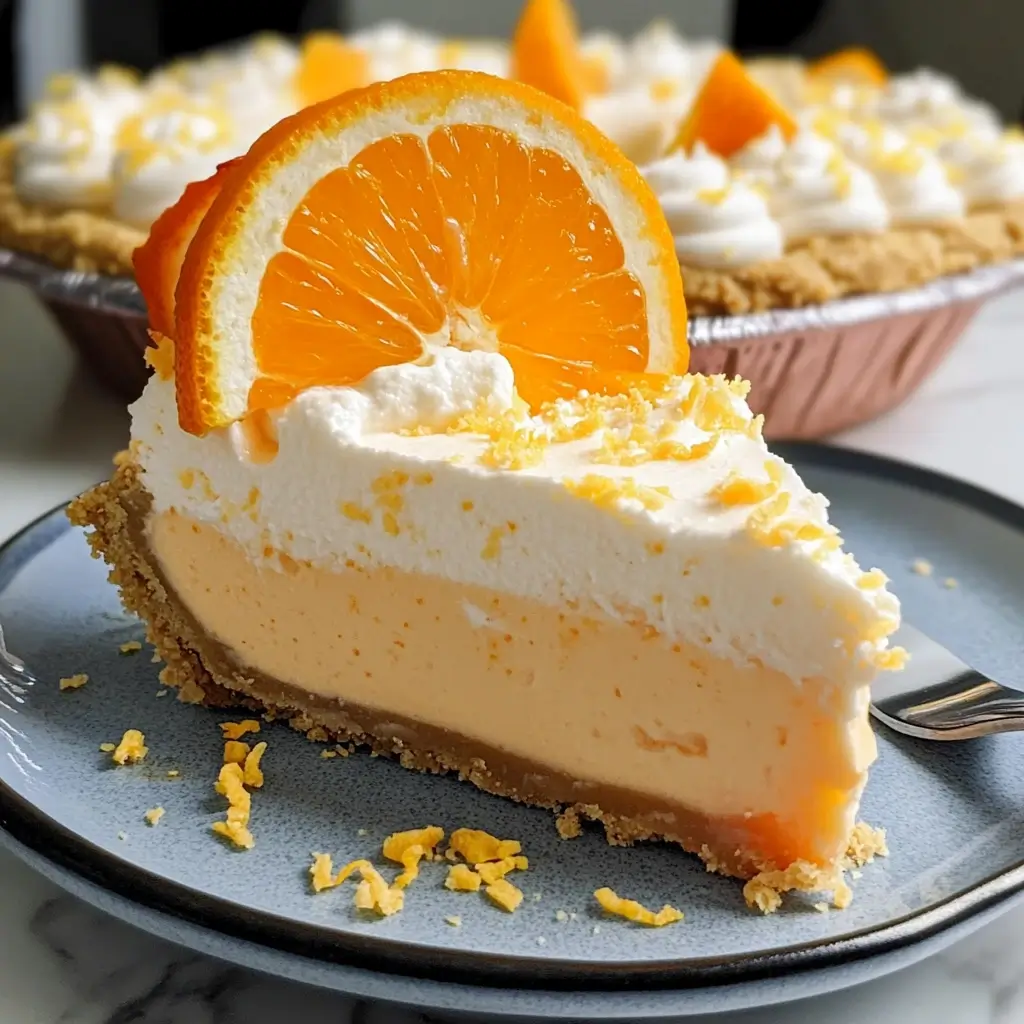
This recipe transforms the classic orange and vanilla ice pop into a luscious, velvety pie. It features a crisp, buttery graham cracker crust holding a cloud-like filling bursting with bright orange flavour and creamy vanilla undertones. Its no-bake nature makes it perfect for any occasion, especially when you want an impressive dessert without heating up your kitchen. Get ready to fall in love with this refreshing, easy-to-make treat that tastes exactly like sunshine and childhood memories blended into one perfect slice.
Ingredients You’ll Need
Gather these simple ingredients to create your creamsicle masterpiece. Using quality ingredients, especially full-fat dairy and good orange juice concentrate, will make a significant difference in the final texture and flavour.
For the Graham Cracker Crust:
- Graham Cracker Crumbs: 1 ½ cups (about 10-12 full graham cracker sheets, finely crushed) – Provides the classic, slightly sweet and crumbly base.
- Unsalted Butter: 6 tablespoons (3/4 stick), melted – Binds the crumbs together and adds richness.
- Granulated Sugar: ¼ cup – Adds a touch of sweetness and helps the crust crisp up during chilling.
- Pinch of Salt: (Optional, about 1/8 teaspoon) – Enhances the other flavours.
For the Silky Orange Creamsicle Filling:
- Cream Cheese: 16 ounces (two 8-ounce packages), softened to room temperature – The foundation of the creamy texture. Full-fat is essential for richness and stability.
- Sweetened Condensed Milk: 1 can (14 ounces) – Provides sweetness, creaminess, and helps the filling set without baking.
- Frozen Orange Juice Concentrate: ¾ cup, thawed but still cold – Delivers intense, bright orange flavour without adding too much liquid.
- Pure Vanilla Extract: 2 teaspoons – Complements the orange and provides that classic “creamsicle” vanilla note.
- Orange Zest: 1 tablespoon, finely grated (from about 1 large orange) – Adds a burst of fresh, aromatic orange oil, enhancing the overall citrus flavour.
- Heavy Whipping Cream: 1 cup, cold – Whips up to create lightness and volume in the filling.
- Alternatively: You can use 1 container (8 ounces) of frozen whipped topping (like Cool Whip), thawed in the refrigerator. This is a convenient shortcut.
- Orange Food Coloring: (Optional) 2-3 drops of gel or liquid food colouring (orange, or a mix of red and yellow) – To achieve that signature vibrant creamsicle orange hue.
For Garnish (Optional but Recommended):
- Whipped Cream: Sweetened, either homemade or store-bought.
- Additional Orange Zest: For sprinkling.
- Small Orange Slices or Segments: For a fresh, decorative touch.
- White Chocolate Curls: Adds elegance and complements the flavours.
Step-by-Step Instructions: Crafting Your Creamsicle Pie
Follow these detailed steps for a perfectly smooth and delicious pie every time. Patience during the chilling phases is key!
Phase 1: Prepare the Graham Cracker Crust
- Crush the Graham Crackers: If using whole graham crackers, place them in a food processor and pulse until they form fine crumbs. Alternatively, place them in a sturdy zip-top bag, seal it, and crush them using a rolling pin or heavy can. Measure out 1 ½ cups of fine crumbs.
- Combine Crust Ingredients: In a medium bowl, combine the graham cracker crumbs, ¼ cup granulated sugar, and the optional pinch of salt. Stir well to distribute the sugar evenly.
- Add Melted Butter: Pour the 6 tablespoons of melted unsalted butter over the crumb mixture. Stir with a fork until all the crumbs are evenly moistened. The mixture should resemble wet sand and hold together when pressed.
- Press Crust into Pan: Transfer the buttery crumb mixture into a 9-inch pie plate (standard depth, not deep-dish). Using the bottom of a measuring cup or your fingers, press the crumbs firmly and evenly onto the bottom and up the sides of the pie plate. Ensure the edge is well-compacted.
- Chill the Crust: Place the pie plate with the crust into the freezer for at least 30 minutes (or the refrigerator for 1 hour). Chilling helps the crust firm up and prevents it from becoming soggy when you add the filling. This step is crucial for a crisp base.
Phase 2: Create the Silky Orange Creamsicle Filling
- Beat the Cream Cheese: In a large bowl, using an electric mixer (handheld or stand mixer with the paddle attachment), beat the softened cream cheese on medium speed until completely smooth and creamy, with no lumps remaining. This usually takes about 2-3 minutes. Scrape down the sides and bottom of the bowl occasionally to ensure everything is incorporated. Softened cream cheese is essential here for a lump-free filling.
- Incorporate Sweetened Condensed Milk: With the mixer on low speed, gradually pour in the sweetened condensed milk. Once added, increase the speed to medium and beat until well combined and the mixture is smooth, about 1-2 minutes.
- Add Orange Flavour: Pour in the thawed orange juice concentrate, vanilla extract, and sprinkle in the fresh orange zest. Beat on low speed initially to avoid splashing, then increase to medium speed and beat until everything is fully incorporated and the mixture is smooth and homogenous, about another 1-2 minutes. Scrape the bowl down again.
- Add Colour (Optional): If using food colouring, add 2-3 drops now. Beat on low speed until the colour is evenly distributed and you achieve your desired creamsicle orange shade. Add more drops sparingly if needed.
- Whip the Cream (If using): In a separate, chilled medium bowl, pour in the 1 cup of cold heavy whipping cream. Using clean beaters (or the whisk attachment), whip the cream on medium-high speed until stiff peaks form. Be careful not to over-whip, or it will become grainy. Stiff peaks mean that when you lift the beaters, the peak holds its shape and doesn’t flop over.
- Fold in Whipped Cream/Topping: Gently fold the whipped heavy cream (or the thawed frozen whipped topping) into the orange cream cheese mixture using a rubber spatula. Use large, gentle folding motions, scraping from the bottom up and over, rotating the bowl. Continue folding just until no white streaks remain. Be careful not to deflate the air incorporated from the whipped cream – this is key to the pie’s light, silky texture. Overmixing will result in a denser filling.
Phase 3: Assemble and Chill the Pie
- Fill the Crust: Retrieve the chilled graham cracker crust from the freezer or refrigerator. Carefully pour the silky orange creamsicle filling into the prepared crust. Spread the filling evenly using the back of a spoon or an offset spatula, smoothing the top.
- Chill to Set: Cover the pie loosely with plastic wrap (try not to let it touch the surface of the filling) or a pie dome. Refrigerate the pie for a minimum of 6-8 hours, but preferably overnight (10-12 hours). This extended chilling time is crucial for the filling to fully set and develop its flavours, achieving that perfect silky texture. The pie needs to be thoroughly cold and firm before slicing.
Phase 4: Garnish and Serve
- Prepare for Serving: Once the pie is fully set and chilled, remove it from the refrigerator just before serving.
- Garnish (Optional): If desired, decorate the pie. You can pipe dollops or rosettes of sweetened whipped cream around the edge or cover the entire top. Sprinkle with additional fresh orange zest for colour and aroma. Add small orange slices or segments for a fresh touch, or sprinkle with white chocolate curls.
- Slice and Serve: Use a sharp knife, wiping it clean between slices for neat cuts. Serve the Silky Orange Creamsicle Pie chilled.
Nutrition Facts (Estimation)
- Servings: 8 slices
- Calories per Serving: Approximately 450-550 kcal (This is an estimate and can vary based on specific ingredient brands, especially the fat content of cream cheese and whipped topping.)
Disclaimer: Nutritional information is an estimate only, calculated using standard ingredient databases. Actual values may vary.
Preparation Time Breakdown
- Crust Preparation: 10-15 minutes
- Filling Preparation: 15-20 minutes
- Chilling Time (Crust): 30 minutes (freezer) or 1 hour (refrigerator)
- Chilling Time (Pie): 6-8 hours minimum, preferably 10-12 hours (overnight)
- Total Time (excluding chilling): Approximately 25-35 minutes
- Total Time (including minimum chilling): Approximately 7 hours
How to Serve Your Silky Orange Creamsicle Pie
Serving this pie chilled is essential to maintain its delightful texture and refreshing quality. Here are some ways to present and enjoy it:
- Classic Slice: Serve a simple, unadorned slice on a dessert plate to let the vibrant colour and creamy texture shine.
- Whipped Cream Delight:
- Top each slice with a generous dollop of freshly whipped cream or stabilized whipped cream piped into rosettes.
- Dust the whipped cream lightly with extra orange zest for visual appeal and an aroma boost.
- Fresh Fruit Accent:
- Garnish slices with small, fresh orange segments or supremes (peeled segments with membrane removed).
- A few fresh raspberries or strawberries can provide a beautiful colour contrast and complementary flavour.
- Sauce Drizzle:
- Drizzle a light vanilla bean crème anglaise around the plate.
- A subtle white chocolate sauce could also be a delicious addition. Avoid overly strong sauces that might overpower the delicate creamsicle flavour.
- Textural Contrast:
- Sprinkle toasted coconut flakes over the whipped cream or around the plate.
- Add a sprinkle of white chocolate curls or shavings.
- Presentation:
- Use clear glass pie plates to show off the distinct layers of crust and filling.
- Serve on chilled dessert plates for the best experience.
- Pairings:
- Enjoy with a light iced tea, a sparkling water with citrus, or even a crisp white wine like a Pinot Grigio or Moscato d’Asti for an adult treat.
- A small scoop of vanilla bean ice cream on the side creates an extra decadent creamsicle experience.
Additional Tips for Creamsicle Pie Perfection
- Room Temperature Cream Cheese is Non-Negotiable: For the smoothest, silkiest filling without lumps, ensure your cream cheese is fully softened to room temperature. Take it out of the fridge at least 1-2 hours before you start mixing. Cold cream cheese simply won’t blend smoothly with the other ingredients.
- Use Frozen Orange Juice Concentrate: Don’t substitute regular orange juice! The concentrate provides a much more intense orange flavour without adding excess liquid, which is crucial for helping the no-bake filling set properly. Thaw it, but keep it cold.
- Chill Time is Crucial: Be patient! Don’t skimp on the chilling time. The pie needs at least 6-8 hours (ideally overnight) in the refrigerator to fully firm up. Trying to slice it too early will result in a soft, potentially messy pie. Proper chilling ensures that perfect sliceable, silky texture.
- Gentle Folding Technique: When incorporating the whipped cream (or thawed whipped topping), use a gentle folding motion with a spatula. Avoid stirring or beating vigorously, as this will deflate the air you whipped in, resulting in a denser, less cloud-like filling. Fold just until combined.
- Make-Ahead Strategy: This pie is perfect for making ahead! Prepare it completely (up to the final garnish) a day or even two before you plan to serve it. Keep it covered tightly in the refrigerator. The flavours actually meld and deepen slightly overnight, making it even more delicious. Add fresh garnishes like whipped cream and zest just before serving.
Frequently Asked Questions (FAQ)
Q1: Can I use fresh orange juice instead of frozen concentrate?
- A: It’s strongly recommended to use frozen orange juice concentrate. Fresh orange juice contains significantly more water and less intense flavour. Using it would likely result in a filling that is too liquid, may not set properly, and will have a much milder orange taste. The concentrate is key to both the flavour intensity and the firm, sliceable texture of this no-bake pie. If you absolutely must, you could try reducing fresh orange juice on the stovetop to concentrate its flavour and reduce water content, but using the frozen concentrate is much easier and more reliable.
Q2: My pie didn’t set firmly. What went wrong?
- A: There are a few potential reasons:
- Insufficient Chilling Time: This is the most common culprit. Ensure the pie chilled for the full recommended time (6-8 hours minimum, overnight is best).
- Incorrect Orange Juice: Using regular orange juice instead of concentrate adds too much liquid.
- Cream Cheese Not Full-Fat: Lower-fat cream cheese has more moisture and less fat, which can affect setting. Use full-fat block cream cheese.
- Overmixing After Adding Whipped Cream: Aggressively mixing can deflate the structure. Fold gently.
- Warm Ingredients: Ensure your heavy cream was cold when whipped, and the concentrate was thawed but still cold.
Q3: Can I make this pie gluten-free?
- A: Absolutely! Simply substitute the regular graham crackers in the crust with your favourite gluten-free graham-style crackers or gluten-free vanilla wafer cookies. Prepare the crust exactly the same way using the gluten-free crumbs. The filling ingredients are naturally gluten-free (but always double-check labels on processed items like sweetened condensed milk and whipped topping if you have severe allergies).
Q4: Can I freeze the Orange Creamsicle Pie?
- A: Yes, this pie freezes reasonably well, though the texture might change slightly upon thawing (it can become a bit icier or slightly separate, especially if frozen for a long time). For best results:
- Chill the pie completely in the refrigerator first until fully set.
- Wrap the set pie tightly in plastic wrap, followed by a layer of aluminum foil, or place it in an airtight freezer-safe container.
- Freeze for up to 1 month.
- Thaw overnight in the refrigerator before slicing and serving. Do not thaw at room temperature. Add fresh garnishes after thawing. It might be slightly firmer than the refrigerated version, almost like an ice cream pie.
Q5: Can I use a different type of crust?
- A: Certainly! While the graham cracker crust is classic, you can easily switch it up. Consider these alternatives:
- Vanilla Wafer Crust: Substitute crushed Nilla wafers for graham crackers (you might need slightly less sugar).
- Shortbread Cookie Crust: Use crushed shortbread cookies for a buttery, richer base.
- Golden Oreo Crust: Crush Golden Oreos (filling included) for a sweeter, vanilla-forward crust. You may need less or no added sugar and potentially less butter due to the filling.
- Pretzel Crust: For a sweet and salty contrast, use crushed pretzels, mixing with sugar and melted butter. This pairs surprisingly well with the sweet filling.
Enjoy creating and savouring this wonderfully Silky Orange Creamsicle Pie – a refreshing slice of sunshine perfect for any occasion!
Print
Silky Orange Creamsicle Pie Recipe
Ingredients
For the Graham Cracker Crust:
- Graham Cracker Crumbs: 1 ½ cups (about 10-12 full graham cracker sheets, finely crushed) – Provides the classic, slightly sweet and crumbly base.
- Unsalted Butter: 6 tablespoons (3/4 stick), melted – Binds the crumbs together and adds richness.
- Granulated Sugar: ¼ cup – Adds a touch of sweetness and helps the crust crisp up during chilling.
- Pinch of Salt: (Optional, about 1/8 teaspoon) – Enhances the other flavours.
For the Silky Orange Creamsicle Filling:
- Cream Cheese: 16 ounces (two 8-ounce packages), softened to room temperature – The foundation of the creamy texture. Full-fat is essential for richness and stability.
- Sweetened Condensed Milk: 1 can (14 ounces) – Provides sweetness, creaminess, and helps the filling set without baking.
- Frozen Orange Juice Concentrate: ¾ cup, thawed but still cold – Delivers intense, bright orange flavour without adding too much liquid.
- Pure Vanilla Extract: 2 teaspoons – Complements the orange and provides that classic “creamsicle” vanilla note.
- Orange Zest: 1 tablespoon, finely grated (from about 1 large orange) – Adds a burst of fresh, aromatic orange oil, enhancing the overall citrus flavour.
- Heavy Whipping Cream: 1 cup, cold – Whips up to create lightness and volume in the filling.
- Alternatively: You can use 1 container (8 ounces) of frozen whipped topping (like Cool Whip), thawed in the refrigerator. This is a convenient shortcut.
- Orange Food Coloring: (Optional) 2-3 drops of gel or liquid food colouring (orange, or a mix of red and yellow) – To achieve that signature vibrant creamsicle orange hue.
Instructions
Phase 1: Prepare the Graham Cracker Crust
- Crush the Graham Crackers: If using whole graham crackers, place them in a food processor and pulse until they form fine crumbs. Alternatively, place them in a sturdy zip-top bag, seal it, and crush them using a rolling pin or heavy can. Measure out 1 ½ cups of fine crumbs.
- Combine Crust Ingredients: In a medium bowl, combine the graham cracker crumbs, ¼ cup granulated sugar, and the optional pinch of salt. Stir well to distribute the sugar evenly.
- Add Melted Butter: Pour the 6 tablespoons of melted unsalted butter over the crumb mixture. Stir with a fork until all the crumbs are evenly moistened. The mixture should resemble wet sand and hold together when pressed.
- Press Crust into Pan: Transfer the buttery crumb mixture into a 9-inch pie plate (standard depth, not deep-dish). Using the bottom of a measuring cup or your fingers, press the crumbs firmly and evenly onto the bottom and up the sides of the pie plate. Ensure the edge is well-compacted.
- Chill the Crust: Place the pie plate with the crust into the freezer for at least 30 minutes (or the refrigerator for 1 hour). Chilling helps the crust firm up and prevents it from becoming soggy when you add the filling. This step is crucial for a crisp base.
Phase 2: Create the Silky Orange Creamsicle Filling
- Beat the Cream Cheese: In a large bowl, using an electric mixer (handheld or stand mixer with the paddle attachment), beat the softened cream cheese on medium speed until completely smooth and creamy, with no lumps remaining. This usually takes about 2-3 minutes. Scrape down the sides and bottom of the bowl occasionally to ensure everything is incorporated. Softened cream cheese is essential here for a lump-free filling.
- Incorporate Sweetened Condensed Milk: With the mixer on low speed, gradually pour in the sweetened condensed milk. Once added, increase the speed to medium and beat until well combined and the mixture is smooth, about 1-2 minutes.
- Add Orange Flavour: Pour in the thawed orange juice concentrate, vanilla extract, and sprinkle in the fresh orange zest. Beat on low speed initially to avoid splashing, then increase to medium speed and beat until everything is fully incorporated and the mixture is smooth and homogenous, about another 1-2 minutes. Scrape the bowl down again.
- Add Colour (Optional): If using food colouring, add 2-3 drops now. Beat on low speed until the colour is evenly distributed and you achieve your desired creamsicle orange shade. Add more drops sparingly if needed.
- Whip the Cream (If using): In a separate, chilled medium bowl, pour in the 1 cup of cold heavy whipping cream. Using clean beaters (or the whisk attachment), whip the cream on medium-high speed until stiff peaks form. Be careful not to over-whip, or it will become grainy. Stiff peaks mean that when you lift the beaters, the peak holds its shape and doesn’t flop over.
- Fold in Whipped Cream/Topping: Gently fold the whipped heavy cream (or the thawed frozen whipped topping) into the orange cream cheese mixture using a rubber spatula. Use large, gentle folding motions, scraping from the bottom up and over, rotating the bowl. Continue folding just until no white streaks remain. Be careful not to deflate the air incorporated from the whipped cream – this is key to the pie’s light, silky texture. Overmixing will result in a denser filling.
Phase 3: Assemble and Chill the Pie
- Fill the Crust: Retrieve the chilled graham cracker crust from the freezer or refrigerator. Carefully pour the silky orange creamsicle filling into the prepared crust. Spread the filling evenly using the back of a spoon or an offset spatula, smoothing the top.
- Chill to Set: Cover the pie loosely with plastic wrap (try not to let it touch the surface of the filling) or a pie dome. Refrigerate the pie for a minimum of 6-8 hours, but preferably overnight (10-12 hours). This extended chilling time is crucial for the filling to fully set and develop its flavours, achieving that perfect silky texture. The pie needs to be thoroughly cold and firm before slicing.
Phase 4: Garnish and Serve
- Prepare for Serving: Once the pie is fully set and chilled, remove it from the refrigerator just before serving.
- Garnish (Optional): If desired, decorate the pie. You can pipe dollops or rosettes of sweetened whipped cream around the edge or cover the entire top. Sprinkle with additional fresh orange zest for colour and aroma. Add small orange slices or segments for a fresh touch, or sprinkle with white chocolate curls.
- Slice and Serve: Use a sharp knife, wiping it clean between slices for neat cuts. Serve the Silky Orange Creamsicle Pie chilled.
Nutrition
- Serving Size: One Normal Portion
- Calories: 450-550