")


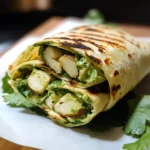
I still remember the first time I made these Grilled Green Goddess Wraps. It was a warm Saturday afternoon, the kind where you crave something fresh, flavorful, but not too heavy. I’d been playing around with homemade Green Goddess dressing recipes, obsessed with capturing that vibrant, herby magic in a jar. My family, initially skeptical about a wrap centered around a green dressing, were completely won over from the first bite. The combination of the smoky, tender grilled chicken, the cool crunch of fresh veggies, and that absolutely addictive creamy, tangy Green Goddess dressing tucked into a warm tortilla was an instant hit. Now, it’s a regular request, perfect for lunches, light dinners, or even picnics. It feels wholesome yet indulgent, packed with flavor and surprisingly easy to whip up. These wraps aren’t just food; they’re a burst of freshness, a celebration of simple ingredients coming together in the most satisfying way, and proof that healthy eating can be incredibly delicious. Every time I make them, the vibrant green color and the incredible aroma fill the kitchen, promising a treat that never disappoints.
The Star of the Show: Ingredients You’ll Need
Gathering your ingredients is the first step towards wrap perfection. This recipe focuses on fresh, high-quality components to ensure the best flavor. We’ve broken it down into the dressing, the grilled chicken, and the wrap assembly elements.
For the Creamy Green Goddess Dressing (Makes approx. 1.5 cups):
- Fresh Parsley: 1 cup, packed (flat-leaf preferred, stems okay)
- Fresh Chives: 1/2 cup, roughly chopped
- Fresh Tarragon: 1/4 cup, packed leaves (or 2 tablespoons dried tarragon)
- Garlic: 2 medium cloves, minced
- Greek Yogurt: 3/4 cup, plain, full-fat or low-fat (ensure it’s thick)
- Mayonnaise: 1/4 cup (good quality, full-fat recommended for richness)
- Lemon Juice: 3 tablespoons, freshly squeezed (about 1 large lemon)
- Anchovy Paste: 1 teaspoon (optional, but adds classic umami depth) OR 2 anchovy fillets, minced
- Dijon Mustard: 1 teaspoon
- Fine Sea Salt: 1/2 teaspoon, or to taste
- Black Pepper: 1/4 teaspoon, freshly ground, or to taste
- Olive Oil (Optional): 1-2 tablespoons, for extra richness and smoother consistency
For the Grilled Chicken:
- Boneless, Skinless Chicken Breasts: 1.5 lbs (about 2-3 large breasts)
- Olive Oil: 2 tablespoons
- Lemon Zest: 1 teaspoon (from the lemon used for dressing)
- Garlic Powder: 1 teaspoon
- Onion Powder: 1/2 teaspoon
- Dried Oregano: 1/2 teaspoon
- Salt: 3/4 teaspoon
- Black Pepper: 1/2 teaspoon, freshly ground
For Assembling the Wraps:
- Large Tortillas: 4-6 (Burrito size, 10-12 inch diameter – use whole wheat, spinach, or regular flour)
- Romaine Lettuce: 1 medium head, washed, dried, and roughly chopped or shredded
- Cucumber: 1 large, thinly sliced into half-moons or rounds
- Avocado: 1 large, ripe, pitted and sliced
- Red Onion: 1/4 cup, very thinly sliced (optional, for a bit of bite)
- Fresh Sprouts (Alfalfa, Broccoli, etc.): 1 cup (optional, for extra crunch and nutrients)
Step-by-Step Instructions: Crafting Your Grilled Green Goddess Wraps
Follow these steps carefully for wrap success. We’ll start with the dressing, move to the chicken, and finish with the assembly.
1. Prepare the Green Goddess Dressing:
- Combine Herbs & Aromatics: In the bowl of a food processor or a high-speed blender, combine the packed parsley, chopped chives, tarragon leaves, and minced garlic. Pulse a few times to roughly chop everything together.
- Add Wet Ingredients: Add the Greek yogurt, mayonnaise, freshly squeezed lemon juice, anchovy paste (if using), and Dijon mustard to the food processor.
- Blend Until Smooth: Process the mixture continuously until the dressing is smooth and creamy, and the herbs are finely incorporated. This might take 1-2 minutes, depending on your appliance. Scrape down the sides of the bowl as needed to ensure everything is evenly blended.
- Adjust Consistency & Seasoning: If the dressing seems too thick, drizzle in 1-2 tablespoons of olive oil or a tablespoon of water while blending until you reach your desired consistency. Taste the dressing and season generously with salt and freshly ground black pepper. Remember that flavors will meld and intensify as it chills.
- Chill: Transfer the dressing to an airtight container or jar and refrigerate for at least 30 minutes before using. This allows the flavors to meld beautifully. The dressing can be made up to 3 days in advance.
2. Prepare and Grill the Chicken:
- Prepare the Chicken: Pat the chicken breasts dry with paper towels. If the breasts are very thick, you can either pound them to an even thickness (about 3/4 inch) using a meat mallet or the bottom of a heavy pan (place chicken between sheets of plastic wrap first) or carefully slice them in half horizontally (butterflying) to create thinner cutlets. This ensures even cooking.
- Season the Chicken: In a small bowl, whisk together the 2 tablespoons of olive oil, lemon zest, garlic powder, onion powder, dried oregano, salt, and pepper. Place the chicken in a shallow dish or a zip-top bag and pour the marinade over it. Toss to coat the chicken evenly. Let it marinate at room temperature for at least 15-20 minutes, or refrigerate for up to 2 hours (let it sit at room temp for 15 minutes before grilling if refrigerated).
- Preheat the Grill: Preheat your outdoor grill or indoor grill pan to medium-high heat (around 400-450°F or 200-230°C). Clean the grill grates and lightly oil them to prevent sticking.
- Grill the Chicken: Place the marinated chicken breasts on the preheated grill. Cook for approximately 5-7 minutes per side, depending on the thickness. The chicken is done when it’s opaque all the way through, the juices run clear when pierced with a fork, and an instant-read thermometer inserted into the thickest part registers 165°F (74°C). Avoid overcooking, as it will result in dry chicken.
- Rest the Chicken: Once cooked, transfer the grilled chicken to a clean cutting board. Tent loosely with foil and let it rest for 5-10 minutes. This crucial step allows the juices to redistribute throughout the meat, resulting in more tender and flavorful chicken.
- Slice or Dice: After resting, slice the chicken against the grain into thin strips or dice it into bite-sized pieces, whichever you prefer for your wraps.
3. Assemble the Grilled Green Goddess Wraps:
- Warm the Tortillas (Optional but Recommended): Warming the tortillas makes them more pliable and easier to wrap without tearing. You can warm them individually in a dry skillet over medium heat for about 20-30 seconds per side, stack them wrapped in a damp paper towel and microwave for 30-45 seconds, or wrap a stack in foil and warm in a low oven (300°F/150°C) for a few minutes.
- Layer the Ingredients: Lay a warm tortilla flat on your work surface. Spread a generous layer (about 2-3 tablespoons) of the chilled Green Goddess dressing down the center of the tortilla, leaving a border of about 1-2 inches around the edges.
- Add Greens and Chicken: Top the dressing with a handful of chopped romaine lettuce. Arrange a portion of the sliced or diced grilled chicken over the lettuce.
- Add Veggies: Layer on the sliced cucumber, avocado slices, thinly sliced red onion (if using), and a sprinkle of fresh sprouts (if using). Be mindful not to overfill the wrap, as it will make rolling difficult.
- Drizzle More Dressing (Optional): For extra flavor and creaminess, add another small drizzle of Green Goddess dressing over the fillings.
- Wrap it Up: Fold in the two sides of the tortilla towards the center, over the filling. Then, starting from the bottom edge closest to you, tightly roll the tortilla up and away from you, keeping the sides tucked in, to form a snug wrap.
- Slice and Serve (Optional): You can serve the wrap whole or slice it in half diagonally with a sharp knife for a nice presentation and easier handling. Repeat the assembly process for the remaining tortillas and fillings.
4. Optional Final Grill:
- Sear the Wraps: For extra flavor and those desirable grill marks on the outside, you can briefly place the assembled wraps seam-side down on the hot grill pan or outdoor grill for 1-2 minutes per side, just until lightly toasted and marked. Watch carefully to prevent burning. This also helps seal the wrap.
Nutrition Facts (Estimated)
- Servings: This recipe makes approximately 4-6 wraps, depending on the size of your tortillas and how generously you fill them.
- Calories per Serving (Approximate): 550 – 650 kcal per wrap.
Disclaimer: Nutritional information is an estimate only and can vary significantly based on specific ingredients used (e.g., type of yogurt/mayonnaise, size of chicken breasts, type of tortilla), portion sizes, and any modifications. For precise nutritional data, consider using an online calculator with your exact ingredients.
Preparation and Cook Time
- Preparation Time: 25-30 minutes (Includes making the dressing, chopping vegetables, and seasoning chicken)
- Marinating Time: 15 minutes (minimum, at room temperature)
- Cook Time: 10-15 minutes (Grilling the chicken)
- Assembly Time: 10 minutes
- Total Time: Approximately 60-70 minutes (including marinating and resting time)
How to Serve Your Grilled Green Goddess Wraps
These wraps are versatile and pair well with various accompaniments. Here are some serving suggestions:
- Serve Immediately: They are best enjoyed fresh when the chicken is warm, the veggies are crisp, and the dressing is cool and creamy.
- Side Dishes:
- Simple Salad: A light side salad with a vinaigrette dressing complements the wrap without overpowering it.
- Fruit Salad: A refreshing bowl of mixed berries, melon, or grapes adds a sweet contrast.
- Potato Chips: Classic kettle-cooked chips or sweet potato chips offer a satisfying crunch.
- Veggie Sticks: Carrot, celery, and bell pepper sticks with extra Green Goddess dressing for dipping.
- Soup: Pair half a wrap with a cup of light vegetable soup or tomato soup for a comforting combo.
- Presentation:
- Slice wraps diagonally and arrange them on a platter for easy grabbing, perfect for gatherings.
- Wrap them tightly in parchment paper or foil for packed lunches or picnics – this helps them hold their shape.
- For a Crowd: Set up a “wrap bar” with all the components separated (dressing, grilled chicken, chopped veggies, tortillas) and let everyone assemble their own.
Additional Tips for Wrap Perfection
- Make the Dressing Ahead: The Green Goddess dressing actually tastes better after it has had time to chill and the flavors meld. Make it a day or two in advance and store it in an airtight container in the refrigerator. This saves time on the day you plan to make the wraps.
- Don’t Skimp on Herbs: The fresh herbs are the heart of the Green Goddess dressing. Use fresh whenever possible for the brightest flavor. If you absolutely must use dried tarragon, use about half the amount called for fresh, but try to keep the parsley and chives fresh. Experiment with other tender herbs like cilantro or mint for variations.
- Protein Power-Ups & Swaps: This recipe is fantastic with grilled chicken, but feel free to substitute! Grilled shrimp, grilled salmon, seasoned chickpeas (for vegetarian), or grilled halloumi cheese (for vegetarian) work wonderfully. Adjust grilling times accordingly for different proteins. Even leftover rotisserie chicken works in a pinch!
- Get Creative with Veggies: While romaine, cucumber, and avocado are classic, don’t hesitate to add other vegetables you enjoy. Thinly sliced bell peppers (any color), shredded carrots, baby spinach, radishes, or even pickled onions can add extra crunch, color, and flavor dimensions.
- Master the Wrap Technique: Avoid overstuffing! It’s tempting, but it makes rolling nearly impossible and leads to messy wraps. Leave a clear border around the fillings. Fold the sides in first before rolling tightly from the bottom up. If your tortillas are stiff, always warm them slightly first to make them pliable.
Frequently Asked Questions (FAQ)
Q1: Can I make these wraps gluten-free?
A1: Absolutely! The filling (chicken, dressing, veggies) is naturally gluten-free. Simply swap the regular flour tortillas for your favorite gluten-free tortillas. Corn tortillas can work but tend to be smaller and less pliable; look for larger, flexible gluten-free wraps often made from rice flour, almond flour, or cassava flour blends. Alternatively, serve the filling components as a “Green Goddess Bowl” over quinoa or rice, or use large lettuce leaves (like butter lettuce or sturdy romaine) as lettuce wraps.
Q2: How can I make this recipe vegetarian or vegan?
A2: For a vegetarian version, replace the grilled chicken with grilled halloumi cheese (grill slices until golden and slightly softened), seasoned and baked tofu or tempeh, or hearty roasted chickpeas seasoned similarly to the chicken. The Green Goddess dressing recipe provided uses yogurt and mayonnaise.
For a vegan version, you’ll need to adjust the dressing and swap the protein. Use a vegan mayonnaise and a thick, unsweetened plant-based yogurt (like coconut, cashew, or soy yogurt) in the dressing. Omit the anchovy paste (you can add a tiny bit of miso paste or extra capers for umami). For the protein, use grilled tofu, tempeh, chickpeas, or even grilled portobello mushrooms. Ensure your tortillas are vegan as well (most are, but check ingredients).
Q3: Can I prepare these Grilled Green Goddess Wraps ahead of time?
A3: You can prepare components ahead, but assembling the wraps is best done just before serving to prevent sogginess.
- Dressing: Make up to 3 days ahead and store refrigerated.
- Chicken: Grill the chicken up to 2 days ahead, let it cool completely, slice/dice, and store refrigerated. You can gently reheat it or serve it cold in the wraps.
- Vegetables: Chop lettuce and cucumber a few hours ahead, store refrigerated. Slice avocado just before assembling to prevent browning.
- Assembly: Assemble wraps no more than a few hours before serving if necessary (e.g., for packed lunches). To minimize sogginess, layer strategically: dressing, then lettuce (as a barrier), then chicken and other drier ingredients, finishing with avocado. Wrap tightly in plastic wrap or foil.
Q4: How should I store leftovers?
A4: It’s best to store leftover components separately. Keep leftover grilled chicken, Green Goddess dressing, and chopped vegetables (except avocado) in airtight containers in the refrigerator for 2-3 days. Assemble fresh wraps as needed. If you have leftover assembled wraps, wrap them tightly in plastic wrap or foil and refrigerate. They are best eaten within 24 hours, but be aware the tortilla may become slightly soggy, especially near the dressing. Reheating assembled wraps is generally not recommended as the fresh veggies will wilt.
Q5: What if I can’t find fresh tarragon?
A5: Fresh tarragon has a unique, slightly anise-like flavor that’s key to classic Green Goddess. If you absolutely cannot find it fresh, you can substitute with dried tarragon, typically using about 1 tablespoon of dried for 1/4 cup fresh. However, the flavor of dried tarragon is much stronger and less nuanced. Start with 1-2 teaspoons of dried tarragon, blend it into the dressing, let it sit for 15-20 minutes for the flavor to infuse, then taste and add more if desired. Alternatively, you could experiment with other fresh herbs like fresh dill or a bit more parsley and chives, though this will alter the classic Green Goddess profile.
Grilled Green Goddess Wraps Recipe
Ingredients
For the Creamy Green Goddess Dressing (Makes approx. 1.5 cups):
- Fresh Parsley: 1 cup, packed (flat-leaf preferred, stems okay)
- Fresh Chives: 1/2 cup, roughly chopped
- Fresh Tarragon: 1/4 cup, packed leaves (or 2 tablespoons dried tarragon)
- Garlic: 2 medium cloves, minced
- Greek Yogurt: 3/4 cup, plain, full-fat or low-fat (ensure it’s thick)
- Mayonnaise: 1/4 cup (good quality, full-fat recommended for richness)
- Lemon Juice: 3 tablespoons, freshly squeezed (about 1 large lemon)
- Anchovy Paste: 1 teaspoon (optional, but adds classic umami depth) OR 2 anchovy fillets, minced
- Dijon Mustard: 1 teaspoon
- Fine Sea Salt: 1/2 teaspoon, or to taste
- Black Pepper: 1/4 teaspoon, freshly ground, or to taste
- Olive Oil (Optional): 1-2 tablespoons, for extra richness and smoother consistency
For the Grilled Chicken:
- Boneless, Skinless Chicken Breasts: 1.5 lbs (about 2-3 large breasts)
- Olive Oil: 2 tablespoons
- Lemon Zest: 1 teaspoon (from the lemon used for dressing)
- Garlic Powder: 1 teaspoon
- Onion Powder: 1/2 teaspoon
- Dried Oregano: 1/2 teaspoon
- Salt: 3/4 teaspoon
- Black Pepper: 1/2 teaspoon, freshly ground
For Assembling the Wraps:
- Large Tortillas: 4-6 (Burrito size, 10-12 inch diameter – use whole wheat, spinach, or regular flour)
- Romaine Lettuce: 1 medium head, washed, dried, and roughly chopped or shredded
- Cucumber: 1 large, thinly sliced into half-moons or rounds
- Avocado: 1 large, ripe, pitted and sliced
- Red Onion: 1/4 cup, very thinly sliced (optional, for a bit of bite)
- Fresh Sprouts (Alfalfa, Broccoli, etc.): 1 cup (optional, for extra crunch and nutrients)
Instructions
1. Prepare the Green Goddess Dressing:
- Combine Herbs & Aromatics: In the bowl of a food processor or a high-speed blender, combine the packed parsley, chopped chives, tarragon leaves, and minced garlic. Pulse a few times to roughly chop everything together.
- Add Wet Ingredients: Add the Greek yogurt, mayonnaise, freshly squeezed lemon juice, anchovy paste (if using), and Dijon mustard to the food processor.
- Blend Until Smooth: Process the mixture continuously until the dressing is smooth and creamy, and the herbs are finely incorporated. This might take 1-2 minutes, depending on your appliance. Scrape down the sides of the bowl as needed to ensure everything is evenly blended.
- Adjust Consistency & Seasoning: If the dressing seems too thick, drizzle in 1-2 tablespoons of olive oil or a tablespoon of water while blending until you reach your desired consistency. Taste the dressing and season generously with salt and freshly ground black pepper. Remember that flavors will meld and intensify as it chills.
- Chill: Transfer the dressing to an airtight container or jar and refrigerate for at least 30 minutes before using. This allows the flavors to meld beautifully. The dressing can be made up to 3 days in advance.
2. Prepare and Grill the Chicken:
- Prepare the Chicken: Pat the chicken breasts dry with paper towels. If the breasts are very thick, you can either pound them to an even thickness (about 3/4 inch) using a meat mallet or the bottom of a heavy pan (place chicken between sheets of plastic wrap first) or carefully slice them in half horizontally (butterflying) to create thinner cutlets. This ensures even cooking.
- Season the Chicken: In a small bowl, whisk together the 2 tablespoons of olive oil, lemon zest, garlic powder, onion powder, dried oregano, salt, and pepper. Place the chicken in a shallow dish or a zip-top bag and pour the marinade over it. Toss to coat the chicken evenly. Let it marinate at room temperature for at least 15-20 minutes, or refrigerate for up to 2 hours (let it sit at room temp for 15 minutes before grilling if refrigerated).
- Preheat the Grill: Preheat your outdoor grill or indoor grill pan to medium-high heat (around 400-450°F or 200-230°C). Clean the grill grates and lightly oil them to prevent sticking.
- Grill the Chicken: Place the marinated chicken breasts on the preheated grill. Cook for approximately 5-7 minutes per side, depending on the thickness. The chicken is done when it’s opaque all the way through, the juices run clear when pierced with a fork, and an instant-read thermometer inserted into the thickest part registers 165°F (74°C). Avoid overcooking, as it will result in dry chicken.
- Rest the Chicken: Once cooked, transfer the grilled chicken to a clean cutting board. Tent loosely with foil and let it rest for 5-10 minutes. This crucial step allows the juices to redistribute throughout the meat, resulting in more tender and flavorful chicken.
- Slice or Dice: After resting, slice the chicken against the grain into thin strips or dice it into bite-sized pieces, whichever you prefer for your wraps.
3. Assemble the Grilled Green Goddess Wraps:
- Warm the Tortillas (Optional but Recommended): Warming the tortillas makes them more pliable and easier to wrap without tearing. You can warm them individually in a dry skillet over medium heat for about 20-30 seconds per side, stack them wrapped in a damp paper towel and microwave for 30-45 seconds, or wrap a stack in foil and warm in a low oven (300°F/150°C) for a few minutes.
- Layer the Ingredients: Lay a warm tortilla flat on your work surface. Spread a generous layer (about 2-3 tablespoons) of the chilled Green Goddess dressing down the center of the tortilla, leaving a border of about 1-2 inches around the edges.
- Add Greens and Chicken: Top the dressing with a handful of chopped romaine lettuce. Arrange a portion of the sliced or diced grilled chicken over the lettuce.
- Add Veggies: Layer on the sliced cucumber, avocado slices, thinly sliced red onion (if using), and a sprinkle of fresh sprouts (if using). Be mindful not to overfill the wrap, as it will make rolling difficult.
- Drizzle More Dressing (Optional): For extra flavor and creaminess, add another small drizzle of Green Goddess dressing over the fillings.
- Wrap it Up: Fold in the two sides of the tortilla towards the center, over the filling. Then, starting from the bottom edge closest to you, tightly roll the tortilla up and away from you, keeping the sides tucked in, to form a snug wrap.
- Slice and Serve (Optional): You can serve the wrap whole or slice it in half diagonally with a sharp knife for a nice presentation and easier handling. Repeat the assembly process for the remaining tortillas and fillings.
4. Optional Final Grill:
- Sear the Wraps: For extra flavor and those desirable grill marks on the outside, you can briefly place the assembled wraps seam-side down on the hot grill pan or outdoor grill for 1-2 minutes per side, just until lightly toasted and marked. Watch carefully to prevent burning. This also helps seal the wrap.
Nutrition
- Serving Size: one normal portion
- Calories: 550 – 650
