")


Of all the treats that whisper tales of childhood, few are as iconic as the Cosmic Brownie. I remember the crinkle of the cellophane wrapper, the dense, almost-fudge-like chocolate square, and the satisfyingly thick layer of frosting. But the real magic was in those crunchy, candy-coated rainbow chips. They were tiny jewels of happiness. When my family went gluten-free, a wave of nostalgia-fueled sadness washed over me. The easy, grab-and-go treats of yesterday were suddenly off-limits. I watched my kids look longingly at the snack aisle, and I knew I had to do something. This wasn’t just about a brownie; it was about reclaiming a piece of simple, uncomplicated joy. After countless batches and a kitchen dusted in a permanent layer of cocoa powder, this recipe was born. The first time I served them, the silence was deafening, broken only by contented chewing. My husband, a notorious brownie connoisseur, looked up and said, “These are better than the original.” My kids, their faces smeared with chocolate, just gave me two enthusiastic, rainbow-studded thumbs up. This Gluten-Free Copycat Cosmic Brownie recipe isn’t just a dessert; it’s a time machine back to recess, a solution for the modern gluten-free family, and a guaranteed way to see pure, unadulterated happiness on the faces of those you love.
Why This is the Ultimate Gluten-Free Cosmic Brownie Recipe
Before we dive into the mixing bowls, let’s talk about why this specific recipe will become your new go-to for all things chocolate and nostalgic. This isn’t just another brownie recipe; it’s a carefully engineered masterpiece designed to replicate and, dare I say, improve upon the classic Little Debbie snack.
- Perfectly Fudgy Texture: We are not making cakey brownies here. This recipe is meticulously balanced to produce a dense, moist, and intensely fudgy crumb that is the hallmark of a true Cosmic Brownie. The secret lies in the ratio of fat and sugar to flour.
- Intense Chocolate Flavor: We use high-quality, Dutch-processed cocoa powder and melted chocolate to create a deep, rich chocolate flavor that isn’t just sweet, but complex and satisfying. This is a brownie for true chocolate lovers.
- Thick, Glossy Ganache Frosting: Forget thin, watery icings. We’re making a simple but luxurious chocolate ganache that sets into a thick, fudgy layer, just like the original. It has a beautiful sheen and a melt-in-your-mouth quality.
- Completely Gluten-Free & Allergy-Friendly: Developed from the ground up to be gluten-free, this recipe doesn’t taste like a compromise. It tastes like an indulgence. We’ll also cover easy swaps to make it dairy-free.
- That Iconic “Cosmic” Crunch: The crowning glory! We’ll tell you exactly where to find those essential candy-coated rainbow chocolate chips that provide the signature look and crunchy texture.
- Surprisingly Simple to Make: Despite the impressive results, the steps are straightforward and accessible even for novice bakers. There are no complicated techniques, just pure baking satisfaction.
The Anatomy of a Perfect Copycat Cosmic Brownie
To successfully recreate an icon, you must first understand what makes it special. The Cosmic Brownie is a symphony of textures and flavors, and each component plays a crucial role.
The Base: The foundation is everything. Unlike a light, airy, cake-like brownie, the Cosmic Brownie base is dense and chewy. It has a tight crumb and a substantial weight to it. This texture is achieved by melting the butter, using a higher ratio of sugar and fat, and being careful not to incorporate too much air when mixing. It should stick to your teeth just a little bit, in the best way possible.
The Frosting: This is not a buttercream or a simple glaze. The original has a distinct, thick, almost-solid layer of chocolate frosting. The best way to replicate this is with a chocolate ganache. A ganache is a simple mixture of chocolate and warm cream. When it cools, it sets into a firm but tender layer that has a rich flavor and a beautifully smooth mouthfeel. It provides a secondary layer of intense chocolate that complements the brownie base perfectly.
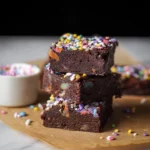
The Topping: The visual and textural star of the show. The “cosmic” element comes from the rainbow-colored, candy-coated chocolate chips. They are not the same as standard rainbow sprinkles or nonpareils. Their hard candy shell provides a distinct, satisfying crunch that contrasts beautifully with the soft brownie and fudgy ganache. Finding the right kind of sprinkle is key to achieving an authentic copycat experience.
Ingredients for Gluten-Free Cosmic Brownies
Accuracy is key in gluten-free baking. For the best results, I highly recommend using a kitchen scale to measure your ingredients, especially the flour. However, I have provided cup measurements as well.
For the Fudgy Gluten-Free Brownies:
- Unsalted Butter: 1 cup (226g or 2 sticks), melted
- Granulated Sugar: 1 ½ cups (300g)
- Light Brown Sugar: ½ cup (100g), packed
- Large Eggs: 4, at room temperature
- Pure Vanilla Extract: 1 tablespoon
- High-Quality 1-to-1 Gluten-Free All-Purpose Flour: 1 ¼ cups (175g) (ensure it contains xanthan gum)
- Unsweetened Dutch-Process Cocoa Powder: ¾ cup (75g), sifted
- Salt: 1 teaspoon
- Baking Powder: ½ teaspoon
For the Rich Chocolate Ganache Frosting:
- Semi-Sweet Chocolate Chips or Chopped Chocolate: 1 ½ cups (255g)
- Heavy Cream: ¾ cup (180ml)
- Iconic Rainbow Candy-Coated Chocolate Chips: ½ cup (or more, for topping!)
Ingredient Notes and Substitution Guide
Understanding your ingredients is the first step to becoming a better baker. Here’s a deeper look at what we’re using and why, along with potential substitutions.
- Gluten-Free Flour: The choice of flour is the single most important decision in this recipe. I strongly recommend using a high-quality “1-to-1” or “measure-for-measure” gluten-free baking blend. My preferred brand is Bob’s Red Mill 1-to-1 Baking Flour (in the blue bag). These blends are specifically formulated with a mix of rice flours, starches, and, crucially, xanthan gum. Xanthan gum is the binder that replaces the gluten, providing structure and preventing your brownies from becoming a crumbly mess. If your blend does not contain xanthan gum, you will need to add about ¾ teaspoon to the dry ingredients. Do not substitute with a single-ingredient flour like almond or coconut flour, as the ratios will be completely different.
- Cocoa Powder: For that deep, dark color and rich, non-bitter flavor reminiscent of the original, Dutch-process cocoa powder is superior. It has been alkalized to neutralize its acidity, resulting in a smoother flavor. You can use natural unsweetened cocoa powder, but the brownies will be lighter in color and have a slightly tangier chocolate flavor. Sifting the cocoa powder is a non-negotiable step to avoid lumps in your batter.
- Butter: We use melted butter for a few reasons. First, it coats the flour proteins and limits gluten (or in our case, pseudo-gluten) development, resulting in a fudgier texture. Second, it contributes to a chewier, denser final product compared to creamed butter. For a dairy-free version, you can substitute the butter with a high-quality vegan butter stick (like Miyoko’s Kitchen or Melt) or an equal amount of melted coconut oil.
- Eggs: Eggs provide moisture, structure, and leavening. They are also key to creating that shiny, crackly top, although it will be covered by ganache. Using room temperature eggs helps them incorporate more smoothly into the batter for a more uniform texture. For an egg-free/vegan version, you can try using four “flax eggs.” To make one flax egg, combine 1 tablespoon of ground flaxseed with 3 tablespoons of water, stir, and let it sit for 10-15 minutes to thicken into a gel.
- Chocolate for Ganache: The quality of your frosting depends entirely on the quality of your chocolate. Use a good quality semi-sweet chocolate that you enjoy eating on its own. Chocolate chips work well, but for the smoothest possible ganache, using a chopped baking chocolate bar (like Ghirardelli or Baker’s) is even better as it melts more evenly. For a dairy-free ganache, use dairy-free chocolate chips (like Enjoy Life brand) and full-fat coconut cream (the thick part from a can of chilled coconut milk) in place of the heavy cream.
- The “Cosmic” Sprinkles: This is what makes the brownie “cosmic”! You are looking for Rainbow Candy Coated Chocolate Chips. They are not the same as regular sprinkles. The most widely available brand is often called “Rainbow Crunch Sprinkles” or similar. You can typically find them on Amazon, at baking supply stores, or sometimes in the baking aisle of larger supermarkets. Do not substitute with nonpareils or jimmies; the texture will be completely different.
Step-by-Step Instructions
Follow these instructions carefully for brownie perfection. We’ll make the brownies first, let them cool completely, and then prepare the ganache frosting.
Part 1: Making the Fudgy Gluten-Free Brownies
- Preheat and Prepare: Preheat your oven to 350°F (175°C). Line an 8×8 inch square baking pan with parchment paper, leaving an overhang on two sides. This overhang will act as “handles” to easily lift the brownies out of the pan later. Lightly grease the parchment paper and any exposed parts of the pan.
- Melt the Butter: In a large, microwave-safe bowl, melt the butter completely. You can also do this in a small saucepan over low heat.
- Combine Wet Ingredients: To the bowl with the melted butter, add the granulated sugar and packed light brown sugar. Whisk vigorously for about a minute until well combined and the mixture looks glossy. Add the four room-temperature eggs and the vanilla extract. Whisk again until the mixture is smooth, thick, and pale. Do not over-whip, as we don’t want to incorporate too much air; we’re aiming for fudgy, not cakey.
- Combine Dry Ingredients: In a separate medium bowl, sift the 1-to-1 gluten-free flour and the Dutch-process cocoa powder together. Add the salt and baking powder and whisk to combine thoroughly. This ensures all the leavening and seasoning is evenly distributed.
- Combine Wet and Dry: Pour the dry ingredient mixture into the wet ingredient mixture. Using a spatula, gently fold the ingredients together until just combined. Be very careful not to overmix. A few small streaks of flour are acceptable. Overmixing develops the starches in the gluten-free flour and can lead to tough brownies.
- Pour and Bake: Pour the thick brownie batter into your prepared 8×8 inch pan. Use the spatula to spread it evenly into all corners. The batter will be very thick. Bake on the center rack of your preheated oven for 30-35 minutes.
- Check for Doneness: To check if the brownies are done, insert a toothpick into the center. It should come out with a few moist, fudgy crumbs attached, but not wet batter. If it comes out completely clean, they are likely overbaked. Gluten-free baked goods can dry out quickly, so it’s better to err on the side of slightly under-baked.
- Cool Completely: This is the most crucial and difficult step! Remove the pan from the oven and place it on a wire cooling rack. Allow the brownies to cool completely in the pan. This can take at least 2-3 hours. Do not, under any circumstances, try to frost or cut warm brownies. They will fall apart and you will have a delicious, but messy, pile of chocolate. Patience is your best friend.
Part 2: Making the Rich Chocolate Ganache and Assembling
- Warm the Cream: Once the brownies are completely cool, you can start the ganache. Pour the heavy cream into a small saucepan and heat over medium-low heat until it is steaming and small bubbles are forming around the edges. Do not let it come to a rolling boil.
- Melt the Chocolate: Place your semi-sweet chocolate chips or chopped chocolate in a medium heat-proof bowl. Pour the hot cream directly over the chocolate. Let the mixture sit, undisturbed, for 5 minutes. This allows the heat from the cream to gently melt the chocolate from the inside out.
- Stir Until Smooth: After 5 minutes, begin stirring the mixture from the center outwards with a whisk or spatula. It might look separated at first, but keep stirring gently. It will magically come together into a smooth, dark, and glossy ganache. If any lumps remain, you can microwave the ganache in 10-second intervals, stirring in between, until fully smooth.
- Frost the Brownies: Pour the warm ganache over your completely cooled brownies (still in the pan). Use an offset spatula or the back of a spoon to spread it evenly all the way to the edges.
- Add the “Cosmic” Touch: Immediately, while the ganache is still wet, sprinkle the rainbow candy-coated chocolate chips generously over the top.
- Set the Ganache: Allow the brownies to sit at room temperature for about 1-2 hours for the ganache to set. To speed up the process, you can place the pan in the refrigerator for 30-45 minutes until the ganache is firm to the touch.
- Cut and Serve: Once the ganache is set, use the parchment paper overhangs to lift the entire slab of brownies out of the pan and onto a cutting board. For clean cuts, use a large, sharp knife. Wipe the knife clean with a damp, hot paper towel between each cut. Cut into 16 squares for a classic size.
Nutrition Facts
- Servings: 16 brownies
- Calories per serving (approximate): 380 kcal
Disclaimer: The nutritional information provided is an estimate and will vary based on the specific brands of ingredients used.
Preparation Time
- Prep Time: 20 minutes
- Cook Time: 35 minutes
- Cooling & Setting Time: 3-4 hours
- Total Time: Approximately 4-5 hours (most of this is hands-off time)
How to Serve Your Gluten-Free Cosmic Brownies
These brownies are a showstopper on their own, but they can be dressed up for any occasion. Here are a few ways to serve them:
- The Classic: Serve a square just as it is, paired with a tall, cold glass of milk (or your favorite dairy-free alternative). The ultimate nostalgic experience.
- A La Mode: Gently warm a brownie in the microwave for 10-15 seconds (just until it’s no longer cold) and top with a generous scoop of vanilla bean ice cream. The contrast of warm brownie, cool ice cream, and crunchy sprinkles is divine.
- Party Platter Perfection: Cut the brownies into smaller, bite-sized squares (32 instead of 16) and arrange them on a platter for parties, potlucks, or bake sales. They are always the first thing to disappear!
- The Ultimate Coffee Break: There’s nothing better than a fudgy brownie to accompany a strong, hot cup of coffee or an afternoon latte. The bitterness of the coffee beautifully cuts through the richness of the chocolate.
- Dessert Charcuterie Board: Include these colorful brownies on a dessert board alongside fresh berries, other cookies, chocolate-covered pretzels, and bowls of whipped cream for dipping.
Additional Tips for Brownie Success
- Do Not Overbake: This is the cardinal sin of brownie baking, especially with gluten-free flour. An overbaked gluten-free brownie will be dry and crumbly. Pull them from the oven when a toothpick shows moist crumbs. They will continue to cook and set from the residual heat in the pan.
- Room Temperature is Your Friend: Using room temperature eggs is crucial for a smooth, emulsified batter. Cold eggs can cause the melted butter to re-solidify, resulting in a greasy or lumpy texture. Take your eggs out of the fridge about 30-60 minutes before you start baking.
- The Parchment Paper Sling is Non-Negotiable: Don’t be tempted to skip the parchment paper overhang. It is the only way to get the entire brownie slab out of the pan without destroying the first few pieces. It also makes cleanup a breeze.
- Achieve Perfectly Clean Cuts: For those bakery-style, sharp-edged brownies, the trick is a hot knife. Fill a tall glass with hot water. Dip a long, sharp knife into the water, wipe it dry with a paper towel, and make one cut. Repeat the process—dip, wipe, cut—for every single cut you make. It’s a little extra work, but the professional-looking results are worth it.
- Storage is Key for Freshness: Store your cut brownies in a single layer in an airtight container at room temperature. They will stay fresh and fudgy for up to 3-4 days. Placing a piece of parchment paper between layers will prevent the ganache from sticking. Avoid storing them in the refrigerator for long periods, as it can dry them out.
Frequently Asked Questions (FAQ)
1. Can I make these brownies dairy-free?
Absolutely! This recipe adapts very well to be dairy-free. Use an equal amount of high-quality vegan butter sticks or melted coconut oil in place of the butter. For the ganache, use dairy-free semi-sweet chocolate chips (like the Enjoy Life brand) and swap the heavy cream for an equal amount of full-fat canned coconut cream (use only the thick, solidified cream from the top of a chilled can).
2. Where can I find the special rainbow candy-coated chocolate chips?
This is the most common question! They are different from standard sprinkles. Search online for “Rainbow Candy Coated Chocolate Chips” or “Rainbow Crunch Sprinkles.” Brands like Betty Crocker sometimes sell them as “Candy-Coated Chips.” They are readily available on Amazon and at specialty baking supply stores like King Arthur Baking or Wilton.
3. Can I make these brownies ahead of time? Can I freeze them?
Yes, these are a great make-ahead dessert. You can bake them a day or two in advance and store them, uncut and covered, at room temperature. For freezing, you have two options. You can freeze the entire uncut slab (well-wrapped in plastic wrap and then foil) for up to 3 months. Or, you can cut them into squares, wrap each one individually, and place them in a freezer-safe bag. To thaw, leave them at room temperature for a few hours.
4. Why did my ganache separate or look grainy?
This usually happens for one of two reasons. Either your cream was too hot (a rolling boil can “scorch” the chocolate), or the chocolate seized. To prevent this, heat the cream until it’s just steaming, not boiling. Pour it over the chocolate and let it sit for a full 5 minutes without stirring to melt gently. If it does separate, you can sometimes save it by adding a tablespoon of very hot water or more warm cream and whisking vigorously until it comes back together.
5. My brownies came out dry. What did I do wrong?
Dry gluten-free brownies are a common problem with a few potential culprits.
- Overbaking: This is the most likely reason. Remember to pull them when a toothpick still has moist crumbs.
- Inaccurate Flour Measurement: Scooping flour directly from the bag with a measuring cup can pack it in, resulting in too much flour. If you don’t have a scale, use the “spoon and level” method: use a spoon to fill your measuring cup, then level it off with the back of a knife.
- Wrong Type of GF Flour: Using a blend without xanthan gum or using a single-ingredient flour like coconut flour will result in a dry, crumbly texture. Stick to a reliable 1-to-1 blend.
Gluten-Free Cosmic Brownie Recipe
Ingredients
For the Fudgy Gluten-Free Brownies:
- Unsalted Butter: 1 cup (226g or 2 sticks), melted
- Granulated Sugar: 1 ½ cups (300g)
- Light Brown Sugar: ½ cup (100g), packed
- Large Eggs: 4, at room temperature
- Pure Vanilla Extract: 1 tablespoon
- High-Quality 1-to-1 Gluten-Free All-Purpose Flour: 1 ¼ cups (175g) (ensure it contains xanthan gum)
- Unsweetened Dutch-Process Cocoa Powder: ¾ cup (75g), sifted
- Salt: 1 teaspoon
- Baking Powder: ½ teaspoon
For the Rich Chocolate Ganache Frosting:
- Semi-Sweet Chocolate Chips or Chopped Chocolate: 1 ½ cups (255g)
- Heavy Cream: ¾ cup (180ml)
- Iconic Rainbow Candy-Coated Chocolate Chips: ½ cup (or more, for topping!)
Instructions
Part 1: Making the Fudgy Gluten-Free Brownies
- Preheat and Prepare: Preheat your oven to 350°F (175°C). Line an 8×8 inch square baking pan with parchment paper, leaving an overhang on two sides. This overhang will act as “handles” to easily lift the brownies out of the pan later. Lightly grease the parchment paper and any exposed parts of the pan.
- Melt the Butter: In a large, microwave-safe bowl, melt the butter completely. You can also do this in a small saucepan over low heat.
- Combine Wet Ingredients: To the bowl with the melted butter, add the granulated sugar and packed light brown sugar. Whisk vigorously for about a minute until well combined and the mixture looks glossy. Add the four room-temperature eggs and the vanilla extract. Whisk again until the mixture is smooth, thick, and pale. Do not over-whip, as we don’t want to incorporate too much air; we’re aiming for fudgy, not cakey.
- Combine Dry Ingredients: In a separate medium bowl, sift the 1-to-1 gluten-free flour and the Dutch-process cocoa powder together. Add the salt and baking powder and whisk to combine thoroughly. This ensures all the leavening and seasoning is evenly distributed.
- Combine Wet and Dry: Pour the dry ingredient mixture into the wet ingredient mixture. Using a spatula, gently fold the ingredients together until just combined. Be very careful not to overmix. A few small streaks of flour are acceptable. Overmixing develops the starches in the gluten-free flour and can lead to tough brownies.
- Pour and Bake: Pour the thick brownie batter into your prepared 8×8 inch pan. Use the spatula to spread it evenly into all corners. The batter will be very thick. Bake on the center rack of your preheated oven for 30-35 minutes.
- Check for Doneness: To check if the brownies are done, insert a toothpick into the center. It should come out with a few moist, fudgy crumbs attached, but not wet batter. If it comes out completely clean, they are likely overbaked. Gluten-free baked goods can dry out quickly, so it’s better to err on the side of slightly under-baked.
- Cool Completely: This is the most crucial and difficult step! Remove the pan from the oven and place it on a wire cooling rack. Allow the brownies to cool completely in the pan. This can take at least 2-3 hours. Do not, under any circumstances, try to frost or cut warm brownies. They will fall apart and you will have a delicious, but messy, pile of chocolate. Patience is your best friend.
Part 2: Making the Rich Chocolate Ganache and Assembling
- Warm the Cream: Once the brownies are completely cool, you can start the ganache. Pour the heavy cream into a small saucepan and heat over medium-low heat until it is steaming and small bubbles are forming around the edges. Do not let it come to a rolling boil.
- Melt the Chocolate: Place your semi-sweet chocolate chips or chopped chocolate in a medium heat-proof bowl. Pour the hot cream directly over the chocolate. Let the mixture sit, undisturbed, for 5 minutes. This allows the heat from the cream to gently melt the chocolate from the inside out.
- Stir Until Smooth: After 5 minutes, begin stirring the mixture from the center outwards with a whisk or spatula. It might look separated at first, but keep stirring gently. It will magically come together into a smooth, dark, and glossy ganache. If any lumps remain, you can microwave the ganache in 10-second intervals, stirring in between, until fully smooth.
- Frost the Brownies: Pour the warm ganache over your completely cooled brownies (still in the pan). Use an offset spatula or the back of a spoon to spread it evenly all the way to the edges.
- Add the “Cosmic” Touch: Immediately, while the ganache is still wet, sprinkle the rainbow candy-coated chocolate chips generously over the top.
- Set the Ganache: Allow the brownies to sit at room temperature for about 1-2 hours for the ganache to set. To speed up the process, you can place the pan in the refrigerator for 30-45 minutes until the ganache is firm to the touch.
- Cut and Serve: Once the ganache is set, use the parchment paper overhangs to lift the entire slab of brownies out of the pan and onto a cutting board. For clean cuts, use a large, sharp knife. Wipe the knife clean with a damp, hot paper towel between each cut. Cut into 16 squares for a classic size.
Nutrition
- Serving Size: One Normal Portion
- Calories: 380 kcal