")


I still remember the first time I made this Bloomin’ Onion Bread. The aroma alone, a tantalizing mix of baking bread and savory onions, had my family practically glued to the kitchen window. When I finally pulled it out of the oven, golden brown and beautifully blossomed, it was met with gasps of delight. One bite, and we were all hooked. The soft, pillowy bread infused with sweet onion flavor, paired with a creamy, tangy dip – it’s an appetizer that disappears in minutes. Since then, this recipe has become a staple for gatherings, game nights, or even just a special weekend treat. It’s surprisingly easy to make, incredibly impressive to serve, and utterly irresistible to eat. Trust me, once you try this Bloomin’ Onion Bread, it will become your new favorite way to enjoy bread and onions!
Ingredients
This Bloomin’ Onion Bread recipe is divided into three key components: the bread itself, the onion bloom, and the accompanying dip. Here’s a breakdown of what you’ll need for each:
For the Bloomin’ Onion Bread Dough:
- 3 ½ cups (420g) All-Purpose Flour: The foundation of our bread, all-purpose flour provides the structure and chewiness we desire. You can also use bread flour for a slightly chewier texture if preferred.
- 1 teaspoon Salt: Salt is crucial for flavor development in bread. It also controls the yeast activity, preventing the dough from rising too quickly and becoming too airy.
- 1 teaspoon Sugar: A touch of sugar feeds the yeast and contributes to browning during baking. It also balances the savory flavors of the onion.
- 1 packet (2 ¼ teaspoons) Active Dry Yeast: The leavening agent, active dry yeast is what makes our bread rise and become light and airy. Ensure your yeast is fresh for optimal results.
- 1 cup (240ml) Warm Milk (105-115°F/40-46°C): Warm milk provides the perfect environment for the yeast to activate and flourish. The warmth should be comfortable to the touch but not scalding, as excessive heat can kill the yeast. Milk also adds richness and tenderness to the bread.
- ¼ cup (60ml) Vegetable Oil: Oil adds moisture and richness to the dough, resulting in a softer crumb and helping to keep the bread moist for longer. Vegetable oil is a neutral choice, but you can also use olive oil for a slightly different flavor profile.
- 1 Large Egg: An egg contributes to the richness, color, and structure of the bread. It helps bind the ingredients and adds a subtle richness to the flavor.
For the Onion Bloom:
- 1 Large Yellow Onion: The star of the show! A large yellow onion offers a balanced sweetness and savory flavor that caramelizes beautifully during baking. Vidalia or white onions can also be used, but yellow onions are generally preferred for their flavor profile in this recipe.
- ¼ cup (60g) Unsalted Butter, Melted: Melted butter adds richness and flavor to the onion bloom, helping it to soften and caramelize in the oven. It also contributes to a beautiful golden-brown color.
- 1 tablespoon Dried Parsley: Parsley adds a touch of herbaceousness and visual appeal to the onion bloom. Dried parsley is convenient, but you can also use fresh parsley, finely chopped.
- 1 teaspoon Garlic Powder: Garlic powder enhances the savory flavors of the onion and butter, adding depth and complexity to the bloom.
- ½ teaspoon Paprika: Paprika adds a subtle smoky sweetness and a vibrant color to the onion bloom. You can use sweet paprika for a milder flavor or smoked paprika for a more intense smoky note.
- ¼ teaspoon Salt: A pinch of salt seasons the onion bloom and helps to draw out moisture, encouraging caramelization.
- ¼ teaspoon Black Pepper: Black pepper adds a touch of spice and enhances the overall flavor of the onion bloom.
For the Creamy Dip:
- ½ cup (120g) Mayonnaise: The base of our creamy and tangy dip, mayonnaise provides richness and body. Use your favorite brand of mayonnaise.
- ¼ cup (60g) Sour Cream: Sour cream adds tanginess and creaminess to the dip, complementing the sweetness of the onions and the richness of the bread.
- 2 tablespoons Ketchup: Ketchup provides sweetness, acidity, and a hint of tomato flavor, adding complexity to the dip.
- 1 tablespoon Prepared Horseradish: Horseradish adds a zesty kick and a pleasant sharpness that cuts through the richness of the dip and bread. Adjust the amount to your preference for spiciness. Creamy horseradish is generally milder than prepared horseradish.
- 1 teaspoon Worcestershire Sauce: Worcestershire sauce adds a depth of umami and savory flavor to the dip, enhancing its overall complexity.
- ½ teaspoon Garlic Powder: Garlic powder reinforces the garlic notes and adds another layer of savory flavor to the dip.
- ¼ teaspoon Paprika: Paprika adds a touch of color and subtle smoky sweetness to the dip.
- Pinch of Salt and Black Pepper: Season the dip to taste with salt and black pepper to balance the flavors and enhance the overall taste.
Instructions
Creating Bloomin’ Onion Bread is a rewarding process. Follow these step-by-step instructions to bring this delicious appetizer to life:
Part 1: Making the Bloomin’ Onion Bread Dough
- Activate the Yeast: In a large bowl, combine the warm milk, sugar, and active dry yeast. Stir gently to combine and let it stand for 5-10 minutes, or until the yeast is foamy. This indicates that the yeast is active and ready to use. If the yeast doesn’t foam, it might be old or inactive, and you’ll need to use fresh yeast.
- Combine Wet Ingredients: To the foamy yeast mixture, add the vegetable oil and the egg. Whisk well to combine all the wet ingredients.
- Incorporate Dry Ingredients: In a separate large bowl, whisk together the flour and salt. Gradually add the dry ingredients to the wet ingredients, mixing with a wooden spoon or a dough hook attachment on a stand mixer until a shaggy dough forms.
- Knead the Dough: Turn the dough out onto a lightly floured surface. Knead for 6-8 minutes, or until the dough becomes smooth, elastic, and no longer sticky. If using a stand mixer, knead with the dough hook for about 5-7 minutes on medium-low speed. The dough should be soft and pliable.
- First Rise (Proofing): Place the kneaded dough in a lightly oiled bowl, turning to coat all sides. Cover the bowl with plastic wrap or a clean kitchen towel. Let the dough rise in a warm place for 1-1.5 hours, or until it has doubled in size. This is crucial for developing the light and airy texture of the bread. The warmer the environment, the faster the dough will rise.
Part 2: Preparing the Onion Bloom
- Prepare the Onion: While the dough is rising, prepare the onion bloom. Peel the large yellow onion and trim off the root end, leaving the stem end intact. Place the onion stem-side down on a cutting board.
- Blooming the Onion: Using a sharp knife, make vertical cuts from the stem end towards the root end, stopping about ½ inch from the root end so that the onion stays intact. Make cuts about ¾ inch apart, all around the onion, resembling petals. Then, make horizontal cuts in between the vertical cuts, again stopping short of the root end. This creates the “bloom” effect. Gently separate the petals of the onion bloom to open it up slightly. Be careful not to cut all the way through the root end, as this will cause the onion to fall apart.
- Prepare the Butter Mixture: In a small bowl, combine the melted butter, dried parsley, garlic powder, paprika, salt, and black pepper. Stir well to ensure all spices are evenly distributed in the melted butter.
- Brush the Onion Bloom: Generously brush the melted butter mixture all over the bloomed onion, making sure to get in between all the petals. This will infuse the onion with flavor and help it caramelize beautifully in the oven.
Part 3: Assembling and Baking the Bloomin’ Onion Bread
- Preheat Oven and Prepare Baking Sheet: Preheat your oven to 375°F (190°C). Line a baking sheet with parchment paper for easy cleanup and to prevent sticking.
- Shape the Dough: Once the dough has doubled in size, gently punch it down to release the air. Turn the dough out onto a lightly floured surface. Shape the dough into a round loaf, slightly flattened on top.
- Place Onion on Dough: Carefully place the prepared onion bloom on top of the center of the dough loaf. Gently press it down slightly to secure it in place.
- Second Rise (Proofing): Cover the assembled bread with a clean kitchen towel and let it rise again in a warm place for 20-30 minutes. This second rise helps to ensure a light and airy final product.
- Bake the Bread: Bake in the preheated oven for 30-35 minutes, or until the bread is golden brown and the onion is tender and caramelized. The internal temperature of the bread should reach 200-210°F (93-99°C). You can check for doneness by inserting a wooden skewer into the center of the bread; it should come out clean.
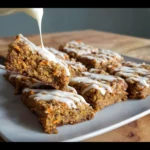
- Cool and Serve: Remove the Bloomin’ Onion Bread from the oven and let it cool slightly on the baking sheet for 5-10 minutes before transferring it to a serving platter. While the bread is cooling, prepare the creamy dip (see instructions below). Serve warm with the creamy dip alongside.
Part 4: Making the Creamy Dip
- Combine Dip Ingredients: In a medium bowl, whisk together the mayonnaise, sour cream, ketchup, prepared horseradish, Worcestershire sauce, garlic powder, paprika, salt, and black pepper.
- Adjust Seasoning: Taste the dip and adjust seasoning as needed. You can add more horseradish for a spicier dip, more ketchup for sweetness, or salt and pepper to taste.
- Chill (Optional): For best flavor, chill the dip in the refrigerator for at least 30 minutes to allow the flavors to meld together. However, it can also be served immediately if desired.
Nutrition Facts
Please note that the nutrition facts are estimates and can vary based on specific ingredients and serving sizes.
- Servings: Approximately 12 servings
- Calories per Serving (estimated): 350-400 calories
Approximate Nutritional Breakdown per Serving:
- Calories: 350-400 kcal
- Fat: 20-25g
- Saturated Fat: 8-10g
- Cholesterol: 50-60mg
- Sodium: 400-500mg
- Carbohydrates: 35-40g
- Fiber: 2-3g
- Sugar: 5-7g
- Protein: 7-9g
Disclaimer: Nutritional information is estimated and should be used as a general guideline. For precise nutritional information, calculate based on the specific brands and quantities of ingredients used.
Preparation Time
- Prep Time: 45 minutes (includes dough making, onion prep, and dip making)
- Rise Time: 1 hour 30 minutes – 2 hours (for both rises combined)
- Bake Time: 30-35 minutes
- Total Time: Approximately 2 hours 45 minutes – 3 hours 15 minutes (from start to finish)
How to Serve
Bloomin’ Onion Bread is a versatile appetizer that can be served in various settings. Here are some serving suggestions:
- As an Appetizer:
- Serve as a show-stopping appetizer for parties, gatherings, and game nights.
- Place the bread on a large platter and surround it with the creamy dip in a separate bowl.
- Provide small plates and napkins for easy serving and enjoyment.
- For Casual Gatherings:
- Perfect for casual get-togethers like backyard barbecues, potlucks, or family dinners.
- It’s a great conversation starter and a crowd-pleaser that everyone will enjoy.
- As a Side Dish:
- While primarily an appetizer, it can also be served as a unique and flavorful side dish alongside:
- Soups and stews
- Salads
- Grilled meats or vegetables
- While primarily an appetizer, it can also be served as a unique and flavorful side dish alongside:
- Presentation Ideas:
- Garnish the platter with fresh parsley sprigs for added visual appeal.
- Serve the creamy dip in a small dipping bowl placed in the center of the bread or on the side.
- For individual servings, you can cut the bread into wedges after baking and serve with small cups of dip.
Additional Tips for Perfect Bloomin’ Onion Bread
Here are five helpful tips to ensure your Bloomin’ Onion Bread turns out perfectly every time:
- Use Fresh Yeast: Ensure your active dry yeast is fresh for optimal rising. If you’re unsure, test it by mixing a teaspoon of yeast and a teaspoon of sugar in ¼ cup of warm water. If it doesn’t foam within 10 minutes, your yeast may be old and should be replaced.
- Don’t Over-Knead the Dough: Kneading is essential, but over-kneading can result in tough bread. Knead just until the dough is smooth and elastic, about 6-8 minutes by hand or 5-7 minutes with a stand mixer.
- Proper Blooming Technique: When blooming the onion, ensure you don’t cut all the way through the root end. This is crucial for keeping the onion intact and creating the beautiful “bloom” effect. Use a sharp knife and make controlled cuts.
- Don’t Skip the Second Rise: The second rise after shaping the dough and placing the onion is important for a light and airy texture. Allow sufficient time for the second rise (20-30 minutes) before baking.
- Monitor Baking Time: Ovens can vary, so keep an eye on the bread during baking. Bake until it’s golden brown and the onion is tender. If the top is browning too quickly, you can loosely tent it with foil for the last 10-15 minutes of baking.
Frequently Asked Questions (FAQ)
Here are five frequently asked questions about making Bloomin’ Onion Bread:
Q1: Can I make the dough ahead of time?
A: Yes, you can prepare the dough ahead of time. After the first rise, punch down the dough, wrap it tightly in plastic wrap, and refrigerate it for up to 24 hours. When ready to bake, let the dough come to room temperature for about 30-60 minutes before proceeding with shaping and the second rise.
Q2: Can I use a different type of onion?
A: While yellow onions are recommended for their balanced flavor, you can experiment with other types. White onions will be milder, and Vidalia onions will be sweeter. Red onions are not recommended as they tend to be more pungent and don’t caramelize as well.
Q3: Can I freeze Bloomin’ Onion Bread?
A: It’s best to enjoy Bloomin’ Onion Bread fresh for optimal texture and flavor. However, you can freeze the baked bread if necessary. Allow it to cool completely, then wrap it tightly in plastic wrap and then in foil or place it in a freezer-safe bag. Freeze for up to 2-3 months. Thaw overnight in the refrigerator and reheat gently in a low oven (around 300°F/150°C) until warmed through. The texture may be slightly different after freezing and thawing.
Q4: Can I make the dip spicier or milder?
A: Absolutely! You can easily adjust the spiciness of the dip. For a spicier dip, add more prepared horseradish or a pinch of cayenne pepper. For a milder dip, reduce the amount of horseradish or omit it altogether. You can also add a touch of sweetness with a bit more ketchup or a teaspoon of sugar.
Q5: What if my dough is too sticky?
A: If your dough is too sticky during kneading, add flour one tablespoon at a time until it becomes manageable. Be careful not to add too much flour, as this can make the bread dry. A slightly sticky dough is often better than a dry dough, as it will result in a softer bread. Lightly flouring your hands and the work surface can also help prevent sticking during kneading.

Bloomin’ Onion Bread Recipe
Ingredients
For the Bloomin’ Onion Bread Dough:
- 3 ½ cups (420g) All-Purpose Flour: The foundation of our bread, all-purpose flour provides the structure and chewiness we desire. You can also use bread flour for a slightly chewier texture if preferred.
- 1 teaspoon Salt: Salt is crucial for flavor development in bread. It also controls the yeast activity, preventing the dough from rising too quickly and becoming too airy.
- 1 teaspoon Sugar: A touch of sugar feeds the yeast and contributes to browning during baking. It also balances the savory flavors of the onion.
- 1 packet (2 ¼ teaspoons) Active Dry Yeast: The leavening agent, active dry yeast is what makes our bread rise and become light and airy. Ensure your yeast is fresh for optimal results.
- 1 cup (240ml) Warm Milk (105-115°F/40-46°C): Warm milk provides the perfect environment for the yeast to activate and flourish. The warmth should be comfortable to the touch but not scalding, as excessive heat can kill the yeast. Milk also adds richness and tenderness to the bread.
- ¼ cup (60ml) Vegetable Oil: Oil adds moisture and richness to the dough, resulting in a softer crumb and helping to keep the bread moist for longer. Vegetable oil is a neutral choice, but you can also use olive oil for a slightly different flavor profile.
- 1 Large Egg: An egg contributes to the richness, color, and structure of the bread. It helps bind the ingredients and adds a subtle richness to the flavor.
For the Onion Bloom:
- 1 Large Yellow Onion: The star of the show! A large yellow onion offers a balanced sweetness and savory flavor that caramelizes beautifully during baking. Vidalia or white onions can also be used, but yellow onions are generally preferred for their flavor profile in this recipe.
- ¼ cup (60g) Unsalted Butter, Melted: Melted butter adds richness and flavor to the onion bloom, helping it to soften and caramelize in the oven. It also contributes to a beautiful golden-brown color.
- 1 tablespoon Dried Parsley: Parsley adds a touch of herbaceousness and visual appeal to the onion bloom. Dried parsley is convenient, but you can also use fresh parsley, finely chopped.
- 1 teaspoon Garlic Powder: Garlic powder enhances the savory flavors of the onion and butter, adding depth and complexity to the bloom.
- ½ teaspoon Paprika: Paprika adds a subtle smoky sweetness and a vibrant color to the onion bloom. You can use sweet paprika for a milder flavor or smoked paprika for a more intense smoky note.
- ¼ teaspoon Salt: A pinch of salt seasons the onion bloom and helps to draw out moisture, encouraging caramelization.
- ¼ teaspoon Black Pepper: Black pepper adds a touch of spice and enhances the overall flavor of the onion bloom.
For the Creamy Dip:
- ½ cup (120g) Mayonnaise: The base of our creamy and tangy dip, mayonnaise provides richness and body. Use your favorite brand of mayonnaise.
- ¼ cup (60g) Sour Cream: Sour cream adds tanginess and creaminess to the dip, complementing the sweetness of the onions and the richness of the bread.
- 2 tablespoons Ketchup: Ketchup provides sweetness, acidity, and a hint of tomato flavor, adding complexity to the dip.
- 1 tablespoon Prepared Horseradish: Horseradish adds a zesty kick and a pleasant sharpness that cuts through the richness of the dip and bread. Adjust the amount to your preference for spiciness. Creamy horseradish is generally milder than prepared horseradish.
- 1 teaspoon Worcestershire Sauce: Worcestershire sauce adds a depth of umami and savory flavor to the dip, enhancing its overall complexity.
- ½ teaspoon Garlic Powder: Garlic powder reinforces the garlic notes and adds another layer of savory flavor to the dip.
- ¼ teaspoon Paprika: Paprika adds a touch of color and subtle smoky sweetness to the dip.
- Pinch of Salt and Black Pepper: Season the dip to taste with salt and black pepper to balance the flavors and enhance the overall taste.
Instructions
Part 1: Making the Bloomin’ Onion Bread Dough
- Activate the Yeast: In a large bowl, combine the warm milk, sugar, and active dry yeast. Stir gently to combine and let it stand for 5-10 minutes, or until the yeast is foamy. This indicates that the yeast is active and ready to use. If the yeast doesn’t foam, it might be old or inactive, and you’ll need to use fresh yeast.
- Combine Wet Ingredients: To the foamy yeast mixture, add the vegetable oil and the egg. Whisk well to combine all the wet ingredients.
- Incorporate Dry Ingredients: In a separate large bowl, whisk together the flour and salt. Gradually add the dry ingredients to the wet ingredients, mixing with a wooden spoon or a dough hook attachment on a stand mixer until a shaggy dough forms.
- Knead the Dough: Turn the dough out onto a lightly floured surface. Knead for 6-8 minutes, or until the dough becomes smooth, elastic, and no longer sticky. If using a stand mixer, knead with the dough hook for about 5-7 minutes on medium-low speed. The dough should be soft and pliable.
- First Rise (Proofing): Place the kneaded dough in a lightly oiled bowl, turning to coat all sides. Cover the bowl with plastic wrap or a clean kitchen towel. Let the dough rise in a warm place for 1-1.5 hours, or until it has doubled in size. This is crucial for developing the light and airy texture of the bread. The warmer the environment, the faster the dough will rise.
Part 2: Preparing the Onion Bloom
- Prepare the Onion: While the dough is rising, prepare the onion bloom. Peel the large yellow onion and trim off the root end, leaving the stem end intact. Place the onion stem-side down on a cutting board.
- Blooming the Onion: Using a sharp knife, make vertical cuts from the stem end towards the root end, stopping about ½ inch from the root end so that the onion stays intact. Make cuts about ¾ inch apart, all around the onion, resembling petals. Then, make horizontal cuts in between the vertical cuts, again stopping short of the root end. This creates the “bloom” effect. Gently separate the petals of the onion bloom to open it up slightly. Be careful not to cut all the way through the root end, as this will cause the onion to fall apart.
- Prepare the Butter Mixture: In a small bowl, combine the melted butter, dried parsley, garlic powder, paprika, salt, and black pepper. Stir well to ensure all spices are evenly distributed in the melted butter.
- Brush the Onion Bloom: Generously brush the melted butter mixture all over the bloomed onion, making sure to get in between all the petals. This will infuse the onion with flavor and help it caramelize beautifully in the oven.
Part 3: Assembling and Baking the Bloomin’ Onion Bread
- Preheat Oven and Prepare Baking Sheet: Preheat your oven to 375°F (190°C). Line a baking sheet with parchment paper for easy cleanup and to prevent sticking.
- Shape the Dough: Once the dough has doubled in size, gently punch it down to release the air. Turn the dough out onto a lightly floured surface. Shape the dough into a round loaf, slightly flattened on top.
- Place Onion on Dough: Carefully place the prepared onion bloom on top of the center of the dough loaf. Gently press it down slightly to secure it in place.
- Second Rise (Proofing): Cover the assembled bread with a clean kitchen towel and let it rise again in a warm place for 20-30 minutes. This second rise helps to ensure a light and airy final product.
- Bake the Bread: Bake in the preheated oven for 30-35 minutes, or until the bread is golden brown and the onion is tender and caramelized. The internal temperature of the bread should reach 200-210°F (93-99°C). You can check for doneness by inserting a wooden skewer into the center of the bread; it should come out clean.
- Cool and Serve: Remove the Bloomin’ Onion Bread from the oven and let it cool slightly on the baking sheet for 5-10 minutes before transferring it to a serving platter. While the bread is cooling, prepare the creamy dip (see instructions below). Serve warm with the creamy dip alongside.
Part 4: Making the Creamy Dip
- Combine Dip Ingredients: In a medium bowl, whisk together the mayonnaise, sour cream, ketchup, prepared horseradish, Worcestershire sauce, garlic powder, paprika, salt, and black pepper.
- Adjust Seasoning: Taste the dip and adjust seasoning as needed. You can add more horseradish for a spicier dip, more ketchup for sweetness, or salt and pepper to taste.
- Chill (Optional): For best flavor, chill the dip in the refrigerator for at least 30 minutes to allow the flavors to meld together. However, it can also be served immediately if desired.
Nutrition
- Serving Size: one normal portion
- Calories: 350-400
- Sugar: 5-7g
- Sodium: 400-500mg
- Fat: 20-25g
- Saturated Fat: 8-10g
- Carbohydrates: 35-40g
- Fiber: 2-3g
- Protein: 7-9g
- Cholesterol: 50-60mg