")


Let me tell you a little secret about my household: we are donut fanatics. Saturday mornings often involve a pilgrimage to our local bakery, and the mere mention of “donuts” is enough to send my kids into a frenzy of excitement. However, the reality of busy weekdays and a desire for healthier (or at least, easier) treats led me on a quest for a simpler solution. That’s when I stumbled upon the seemingly unbelievable world of 2-Ingredient Donuts. Skeptical at first, I decided to give it a try, and let me tell you, the results were nothing short of magical.
From the moment the first batch puffed up in the oven, filling my kitchen with a delightful, sweet aroma, I knew this recipe was a game-changer. The simplicity is astounding – just two ingredients transform into fluffy, delicious donuts in a matter of minutes. My kids, who are usually very discerning critics when it comes to anything homemade, devoured them. “These are even better than store-bought!” my eldest declared, a statement that earned this recipe instant legendary status in our home. Since then, 2-Ingredient Donuts have become a regular treat, perfect for quick breakfasts, last-minute desserts, or just a fun afternoon baking project. If you’re looking for a ridiculously easy, surprisingly delicious, and undeniably crowd-pleasing recipe, look no further. Prepare to be amazed by the sheer simplicity and delightful outcome of these 2-Ingredient Donuts.
Ingredients
This is where the magic truly lies – the incredibly short and sweet ingredient list. You’ll need just two pantry staples to embark on your donut-making journey:
- 2 cups Self-Rising Flour: This is the star of the show and absolutely crucial for the recipe’s success. Self-rising flour is pre-mixed with baking powder and salt, which provides the necessary leavening to make the donuts light and airy. Using all-purpose flour will not work without adding baking powder and salt, and even then, the proportions might be tricky to get exactly right for this simplified recipe. Ensure your self-rising flour is fresh for the best results. Old flour can lose its leavening power, resulting in denser donuts. If you’re unsure about the freshness, you can test it by placing a spoonful in a glass of hot water. If it bubbles and fizzes, it’s still good to use. For optimal texture, sift the self-rising flour before measuring. This removes any lumps and ensures a lighter, more consistent batter. Different brands of self-rising flour can vary slightly in their composition, so you might need to adjust the yogurt quantity slightly depending on the brand you use. Look for a good quality self-rising flour for the best flavor and texture. Consider using organic or unbleached self-rising flour for a potentially healthier option, although the nutritional difference might be minimal. If you are in a humid climate, you might find that your self-rising flour absorbs moisture from the air. In this case, you might need to add a tablespoon or two more of flour to achieve the right dough consistency.
- 1 cup Plain Greek Yogurt (Full Fat or Low Fat): The second hero ingredient, Greek yogurt, adds moisture, tang, and protein to the donuts. Plain Greek yogurt is recommended because flavored yogurts can alter the taste and sweetness of the final product, and often contain added sugars and artificial ingredients. Full-fat Greek yogurt will result in richer, more tender donuts due to its higher fat content, which contributes to moisture and flavor. However, low-fat or even non-fat Greek yogurt can also be used for a slightly lighter version, although the texture might be a tad drier. Make sure to use plain Greek yogurt, not regular yogurt. Regular yogurt is thinner and contains more whey, which will make the dough too sticky and difficult to handle. Greek yogurt, on the other hand, is strained to remove whey, resulting in a thicker, creamier texture that is perfect for this recipe. The acidity of the Greek yogurt also reacts with the baking powder in the self-rising flour, further enhancing the leavening process and contributing to the donuts’ light and fluffy texture. For a slightly different flavor profile, you could experiment with different types of plain Greek yogurt, such as sheep’s milk or goat’s milk Greek yogurt, which have distinct tastes. Ensure your Greek yogurt is cold from the refrigerator. Cold yogurt helps to keep the dough cool, which is beneficial when working with dough and prevents the gluten from developing too much, resulting in more tender donuts. If you don’t have Greek yogurt on hand, you could try substituting with plain Skyr, which is another type of strained yogurt with a similar consistency to Greek yogurt.
That’s it! Just these two ingredients are all you need to create these surprisingly delightful donuts. The simplicity is truly remarkable, making this recipe perfect for beginner bakers, busy individuals, or anyone who appreciates a quick and easy treat.
Instructions
Making these 2-Ingredient Donuts is as straightforward as it gets. Follow these simple steps, and you’ll be enjoying warm, homemade donuts in no time:
- Preheat your oven to 350°F (175°C) and prepare your baking sheet: Start by preheating your oven to the correct temperature. 350°F (175°C) is the ideal temperature for baking these donuts, ensuring they cook through evenly without burning on the outside. While the oven is preheating, prepare a baking sheet. Line it with parchment paper or a silicone baking mat. Parchment paper prevents the donuts from sticking to the baking sheet and makes for easy cleanup. A silicone baking mat is a reusable alternative that also provides excellent non-stick properties. If you don’t have parchment paper or a baking mat, you can lightly grease the baking sheet with cooking spray or butter. However, parchment paper or a baking mat is highly recommended for the best results and easiest removal of the donuts. Ensure the baking sheet is large enough to accommodate all the donuts without overcrowding. Overcrowding can prevent proper air circulation and result in unevenly baked donuts.
- Combine the ingredients: In a large mixing bowl, add the 2 cups of self-rising flour and 1 cup of plain Greek yogurt. Use a spatula or wooden spoon to gently combine the ingredients. Start by stirring slowly to prevent the flour from puffing up and creating a mess. As you stir, the mixture will initially appear crumbly and dry. Continue to mix until the dough starts to come together and form a shaggy ball. Avoid overmixing the dough. Overmixing can develop the gluten in the flour, resulting in tougher donuts. Mix just until the ingredients are combined and a dough forms. It’s okay if the dough is slightly sticky at this stage. If the dough appears too dry and crumbly, add a tablespoon of Greek yogurt at a time until it comes together. Conversely, if the dough is too sticky and wet, add a tablespoon of self-rising flour at a time until it is manageable. The ideal dough consistency should be slightly sticky but still workable with your hands.
- Turn out the dough and knead gently: Lightly flour a clean work surface. Turn the dough out onto the floured surface. Dust your hands with a little flour to prevent sticking. Gently knead the dough for about 2-3 minutes. Kneading helps to bring the dough together and create a smoother texture. However, remember to knead gently, as over-kneading can make the donuts tough. The dough should become smoother and less sticky as you knead. If the dough is still too sticky, add a tiny bit more flour to your work surface and hands. Form the dough into a smooth ball.
- Shape the donuts: There are a few ways to shape your donuts:
- Donut Holes: For the simplest option, pinch off small pieces of dough, about 1-inch in size, and roll them into balls. Place the dough balls onto the prepared baking sheet. These will bake into donut holes.
- Classic Donuts: For classic donut shapes, roll the dough out to about ½-inch thickness. Use a donut cutter or two different-sized round cookie cutters (or even a glass and a bottle cap) to cut out donut shapes. A standard donut cutter will create a perfect ring shape. If using cookie cutters or a glass and bottle cap, use the larger cutter to cut out circles, and then use the smaller cutter or bottle cap to cut out the center hole. Place the donut shapes onto the prepared baking sheet. Gather the dough scraps, gently re-knead them, and roll them out again to cut out more donuts until all the dough is used. This ensures minimal dough wastage.
- Bake the donuts: Place the baking sheet with the shaped donuts in the preheated oven. Bake for 12-15 minutes, or until the donuts are lightly golden brown and cooked through. The baking time may vary slightly depending on your oven and the size of your donuts. Keep an eye on them and check for doneness around the 12-minute mark. A toothpick inserted into the center of a donut should come out clean when they are done. The donuts should puff up slightly and become light and airy as they bake.
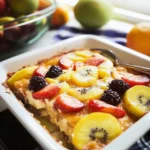
- Cool and decorate (optional): Once baked, remove the donuts from the oven and let them cool on the baking sheet for a few minutes before transferring them to a wire rack to cool completely. Cooling on a wire rack prevents the bottoms of the donuts from becoming soggy. While the donuts are cooling, you can prepare any desired toppings or glazes. These donuts are delicious plain, but they are also fantastic with various toppings. Consider dusting them with powdered sugar, cinnamon sugar, or dipping them in a simple glaze (recipe ideas in the “How to Serve” section). Decorate the donuts while they are still slightly warm, as glazes and toppings adhere better to warm surfaces.
Enjoy your incredibly easy and delicious 2-Ingredient Donuts!
Nutrition Facts
(Approximate values, per serving. Nutritional information can vary based on specific ingredient brands and serving size.)
- Servings: Approximately 12-16 donuts (depending on size)
- Serving Size: 1-2 donuts
- Calories per serving (1 donut, approximate): 100-150 calories
- Calories per serving (2 donuts, approximate): 200-300 calories
- Macronutrients (per donut, approximate):
- Protein: 3-5 grams
- Carbohydrates: 15-20 grams
- Fat: 2-5 grams (depending on yogurt fat content)
Important Note: These are estimated nutritional values. For precise nutritional information, it’s recommended to use a nutrition calculator and input the specific brands and quantities of ingredients you use. Keep in mind that adding toppings like glazes or sprinkles will significantly increase the calorie and sugar content. These 2-Ingredient Donuts are generally considered a treat and should be enjoyed in moderation as part of a balanced diet. While they are simpler to make than traditional donuts and might have slightly fewer ingredients, they are still a dessert and not a low-calorie or health food. Choosing low-fat Greek yogurt will reduce the fat content slightly, but the carbohydrate content will remain relatively similar due to the flour.
Preparation Time
The beauty of this recipe is not only its simplicity in ingredients but also its speed of preparation. Here’s a breakdown of the approximate time involved:
- Prep Time: 10-15 minutes (This includes gathering ingredients, mixing the dough, kneading briefly, and shaping the donuts.)
- Bake Time: 12-15 minutes (Oven time)
- Cooling Time: 10-15 minutes (Allowing donuts to cool slightly before decorating and serving)
- Total Time: Approximately 30-45 minutes
From start to finish, you can have fresh, homemade donuts ready to enjoy in under an hour! This quick preparation time makes them perfect for spontaneous cravings, last-minute guests, or when you need a sweet treat in a hurry. The minimal prep work also makes it a great recipe to involve kids in the kitchen. They will love helping to mix the dough, shape the donuts, and of course, decorate them! The fast baking time means they won’t lose interest waiting for a long time to see the finished product. Compared to traditional donut recipes that often involve yeast, rising time, and deep frying, this 2-Ingredient Donut recipe is a significant time-saver. It’s a fantastic way to satisfy your donut craving without spending hours in the kitchen.
How to Serve
These 2-Ingredient Donuts are incredibly versatile and can be served in a variety of ways. Here are some delicious serving suggestions:
- Simply Delicious Plain: Sometimes, the simplest is best. These donuts are wonderful enjoyed plain and warm, straight from the oven. The subtle tang of the yogurt and the light sweetness of the baked dough are satisfying on their own.
- Dust with Powdered Sugar: A classic donut topping! Dust the warm donuts generously with powdered sugar (also known as confectioners’ sugar). The powdered sugar melts slightly into the warm donut, creating a sweet and elegant finish. You can use a fine-mesh sieve to evenly distribute the powdered sugar.
- Cinnamon Sugar Coating: Another timeless favorite. Mix together granulated sugar and ground cinnamon (ratio of about 1/4 cup sugar to 1-2 teaspoons cinnamon, adjust to your preference). While the donuts are still warm, brush them lightly with melted butter (optional, but helps the cinnamon sugar stick) and then roll them in the cinnamon sugar mixture, ensuring they are evenly coated.
- Simple Glaze: Create a basic glaze by whisking together powdered sugar with a liquid like milk, water, or lemon juice until you reach a smooth, pourable consistency. You can also add a touch of vanilla extract or other flavorings to the glaze. Dip the cooled donuts into the glaze and let the excess drip off. You can then add sprinkles or other decorations to the glaze before it sets.
- Chocolate Glaze: For chocolate lovers, melt chocolate chips or chopped chocolate with a little butter or milk until smooth. Dip the cooled donuts in the chocolate glaze and let it set. You can use dark chocolate, milk chocolate, or white chocolate, or even a combination. Add sprinkles, chopped nuts, or mini chocolate chips to the chocolate glaze for extra flair.
- Maple Glaze: Combine powdered sugar with maple syrup to create a rich and flavorful maple glaze. Adjust the amount of maple syrup to achieve your desired consistency and maple flavor intensity. Maple glaze pairs particularly well with a sprinkle of chopped pecans or walnuts.
- Fruit Glaze: Incorporate fruit flavors into your glaze by using fruit juice instead of milk or water. Lemon juice for lemon glaze, orange juice for orange glaze, or even pureed berries for a berry glaze. You can also add zest from citrus fruits to enhance the flavor.
- Served with Coffee or Tea: Donuts and coffee or tea are a classic pairing. Enjoy these 2-Ingredient Donuts with your morning coffee, afternoon tea, or as an after-dinner treat alongside a warm beverage.
- Donut Sundae: For a more indulgent dessert, create a donut sundae. Slice the donuts in half, top with a scoop of ice cream (vanilla, chocolate, or your favorite flavor), drizzle with chocolate sauce or caramel sauce, and add whipped cream and sprinkles.
- Donut French Toast Sticks: Get creative and repurpose leftover donuts (if you have any!). Slice the donuts into sticks, dip them in an egg and milk mixture like French toast batter, and pan-fry or bake them until golden brown. Serve with syrup or fruit.
These are just a few ideas to get you started. Feel free to experiment with different toppings, glazes, and serving suggestions to create your own signature 2-Ingredient Donut experience!
Additional Tips for Perfect 2-Ingredient Donuts
While this recipe is incredibly simple, these tips will help you achieve the best possible results every time:
- Don’t Overmix the Dough: As mentioned earlier, overmixing can lead to tough donuts. Mix the dough just until the ingredients are combined and a shaggy ball forms. It’s okay if it’s slightly sticky. Gentle handling is key to tender donuts. Think of it like muffin batter – you want to mix it just until combined, not until it’s smooth and elastic like bread dough.
- Flour Your Surface and Hands Lightly: The dough can be a bit sticky, so lightly flouring your work surface and hands is essential for easy handling and shaping. However, avoid adding too much extra flour to the dough itself, as this can make the donuts dry. Use just enough flour to prevent sticking. A light dusting is usually sufficient.
- Use Fresh Self-Rising Flour: The leavening power of baking powder in self-rising flour diminishes over time. Using fresh self-rising flour ensures that your donuts will rise properly and be light and airy. Check the expiration date on your flour and store it in an airtight container in a cool, dry place to maintain its freshness. If you’re unsure about the freshness, test a small amount as described in the “Ingredients” section.
- Bake Until Just Golden Brown: Overbaking can make the donuts dry and hard. Bake them until they are lightly golden brown and spring back slightly when gently pressed. Keep a close eye on them in the last few minutes of baking to prevent overbrowning. The internal temperature should reach around 200-210°F (93-99°C) for optimal doneness, though visual cues are usually sufficient for this recipe.
- Experiment with Flavor Variations: While the base recipe is simple, you can easily customize the flavor of your donuts. Add a teaspoon of vanilla extract or almond extract to the dough for a subtle flavor boost. You can also incorporate spices like cinnamon, nutmeg, or cardamom. For citrus flavor, add lemon or orange zest to the dough. For a savory twist, try adding a pinch of salt and some herbs like rosemary or thyme for a unique appetizer donut. Consider adding a tablespoon or two of cocoa powder for chocolate donuts (you might need to adjust the flour or yogurt slightly to maintain the right consistency).
By following these tips, you’ll be well on your way to mastering the art of 2-Ingredient Donuts and impressing everyone with your incredibly easy and delicious homemade treats!
FAQ – Frequently Asked Questions about 2-Ingredient Donuts
Q1: Can I use all-purpose flour instead of self-rising flour?
A: No, self-rising flour is crucial for this recipe. It contains baking powder and salt, which provide the necessary leavening for the donuts to rise and become light and airy. Using all-purpose flour without adding baking powder and salt will result in flat, dense, and hard donuts. If you absolutely must use all-purpose flour, you can try making your own self-rising flour substitute by adding 1 ½ teaspoons of baking powder and ¼ teaspoon of salt per cup of all-purpose flour. However, the results might not be exactly the same as using pre-made self-rising flour, and it’s generally recommended to use self-rising flour for this recipe.
Q2: Can I fry these donuts instead of baking them?
A: Yes, you can fry these donuts! For fried donuts, heat about 2-3 inches of vegetable oil or canola oil in a deep pot or fryer to 350°F (175°C). Carefully drop the donut shapes into the hot oil, a few at a time, being careful not to overcrowd the pot. Fry for about 1-2 minutes per side, or until golden brown and cooked through. Remove the fried donuts with a slotted spoon and place them on a wire rack lined with paper towels to drain excess oil. Fried donuts will have a slightly different texture – they will be more golden brown and crispy on the outside and softer on the inside, compared to baked donuts which are generally softer overall. Be very careful when frying with hot oil and never leave the pot unattended.
Q3: Can I make these donuts ahead of time?
A: These donuts are best enjoyed fresh and warm. However, you can make them a few hours ahead of time and store them at room temperature in an airtight container. They might lose some of their initial softness and fluffiness over time. To refresh slightly stale donuts, you can briefly warm them in a microwave for a few seconds or in a low oven for a few minutes. For longer storage, you can freeze baked and cooled donuts in an airtight container for up to a month. Thaw them at room temperature or in the microwave before serving. Keep in mind that glazed or decorated donuts might not freeze as well, as the glaze can become sticky or the decorations might lose their appeal. It’s best to freeze plain donuts and glaze or decorate them after thawing.
Q4: My dough is too sticky, what should I do?
A: The dough for 2-Ingredient Donuts is naturally a bit sticky. However, if it’s excessively sticky and unmanageable, add a tablespoon of self-rising flour at a time until it becomes easier to handle. Be careful not to add too much flour, as this can make the donuts dry. Lightly flouring your work surface and hands generously will also help to manage sticky dough. The humidity in your environment can also affect the dough consistency. On humid days, you might need to use slightly more flour. If you are using low-fat or non-fat Greek yogurt, the dough might be slightly stickier compared to using full-fat yogurt.
Q5: Can I use flavored yogurt instead of plain Greek yogurt?
A: While you can technically use flavored yogurt, plain Greek yogurt is highly recommended for this recipe. Flavored yogurts often contain added sugars, artificial flavors, and thickeners, which can alter the taste and texture of the donuts and may make them overly sweet. Using plain Greek yogurt allows you to control the sweetness and flavor profile of your donuts through toppings and glazes. If you do choose to experiment with flavored yogurt, opt for unsweetened or lightly sweetened varieties and adjust any added sugar accordingly. Be aware that flavored yogurts might also have a slightly different consistency than plain Greek yogurt, which could affect the dough texture.
Print
2-Ingredient Donut Recipe
Ingredients
- 2 cups Self-Rising Flour: This is the star of the show and absolutely crucial for the recipe’s success. Self-rising flour is pre-mixed with baking powder and salt, which provides the necessary leavening to make the donuts light and airy. Using all-purpose flour will not work without adding baking powder and salt, and even then, the proportions might be tricky to get exactly right for this simplified recipe. Ensure your self-rising flour is fresh for the best results. Old flour can lose its leavening power, resulting in denser donuts. If you’re unsure about the freshness, you can test it by placing a spoonful in a glass of hot water. If it bubbles and fizzes, it’s still good to use. For optimal texture, sift the self-rising flour before measuring. This removes any lumps and ensures a lighter, more consistent batter. Different brands of self-rising flour can vary slightly in their composition, so you might need to adjust the yogurt quantity slightly depending on the brand you use. Look for a good quality self-rising flour for the best flavor and texture. Consider using organic or unbleached self-rising flour for a potentially healthier option, although the nutritional difference might be minimal. If you are in a humid climate, you might find that your self-rising flour absorbs moisture from the air. In this case, you might need to add a tablespoon or two more of flour to achieve the right dough consistency.
- 1 cup Plain Greek Yogurt (Full Fat or Low Fat): The second hero ingredient, Greek yogurt, adds moisture, tang, and protein to the donuts. Plain Greek yogurt is recommended because flavored yogurts can alter the taste and sweetness of the final product, and often contain added sugars and artificial ingredients. Full-fat Greek yogurt will result in richer, more tender donuts due to its higher fat content, which contributes to moisture and flavor. However, low-fat or even non-fat Greek yogurt can also be used for a slightly lighter version, although the texture might be a tad drier. Make sure to use plain Greek yogurt, not regular yogurt. Regular yogurt is thinner and contains more whey, which will make the dough too sticky and difficult to handle. Greek yogurt, on the other hand, is strained to remove whey, resulting in a thicker, creamier texture that is perfect for this recipe. The acidity of the Greek yogurt also reacts with the baking powder in the self-rising flour, further enhancing the leavening process and contributing to the donuts’ light and fluffy texture. For a slightly different flavor profile, you could experiment with different types of plain Greek yogurt, such as sheep’s milk or goat’s milk Greek yogurt, which have distinct tastes. Ensure your Greek yogurt is cold from the refrigerator. Cold yogurt helps to keep the dough cool, which is beneficial when working with dough and prevents the gluten from developing too much, resulting in more tender donuts. If you don’t have Greek yogurt on hand, you could try substituting with plain Skyr, which is another type of strained yogurt with a similar consistency to Greek yogurt.
Instructions
- Preheat your oven to 350°F (175°C) and prepare your baking sheet: Start by preheating your oven to the correct temperature. 350°F (175°C) is the ideal temperature for baking these donuts, ensuring they cook through evenly without burning on the outside. While the oven is preheating, prepare a baking sheet. Line it with parchment paper or a silicone baking mat. Parchment paper prevents the donuts from sticking to the baking sheet and makes for easy cleanup. A silicone baking mat is a reusable alternative that also provides excellent non-stick properties. If you don’t have parchment paper or a baking mat, you can lightly grease the baking sheet with cooking spray or butter. However, parchment paper or a baking mat is highly recommended for the best results and easiest removal of the donuts. Ensure the baking sheet is large enough to accommodate all the donuts without overcrowding. Overcrowding can prevent proper air circulation and result in unevenly baked donuts.
- Combine the ingredients: In a large mixing bowl, add the 2 cups of self-rising flour and 1 cup of plain Greek yogurt. Use a spatula or wooden spoon to gently combine the ingredients. Start by stirring slowly to prevent the flour from puffing up and creating a mess. As you stir, the mixture will initially appear crumbly and dry. Continue to mix until the dough starts to come together and form a shaggy ball. Avoid overmixing the dough. Overmixing can develop the gluten in the flour, resulting in tougher donuts. Mix just until the ingredients are combined and a dough forms. It’s okay if the dough is slightly sticky at this stage. If the dough appears too dry and crumbly, add a tablespoon of Greek yogurt at a time until it comes together. Conversely, if the dough is too sticky and wet, add a tablespoon of self-rising flour at a time until it is manageable. The ideal dough consistency should be slightly sticky but still workable with your hands.
- Turn out the dough and knead gently: Lightly flour a clean work surface. Turn the dough out onto the floured surface. Dust your hands with a little flour to prevent sticking. Gently knead the dough for about 2-3 minutes. Kneading helps to bring the dough together and create a smoother texture. However, remember to knead gently, as over-kneading can make the donuts tough. The dough should become smoother and less sticky as you knead. If the dough is still too sticky, add a tiny bit more flour to your work surface and hands. Form the dough into a smooth ball.
- Shape the donuts: There are a few ways to shape your donuts:
- Donut Holes: For the simplest option, pinch off small pieces of dough, about 1-inch in size, and roll them into balls. Place the dough balls onto the prepared baking sheet. These will bake into donut holes.
- Classic Donuts: For classic donut shapes, roll the dough out to about ½-inch thickness. Use a donut cutter or two different-sized round cookie cutters (or even a glass and a bottle cap) to cut out donut shapes. A standard donut cutter will create a perfect ring shape. If using cookie cutters or a glass and bottle cap, use the larger cutter to cut out circles, and then use the smaller cutter or bottle cap to cut out the center hole. Place the donut shapes onto the prepared baking sheet. Gather the dough scraps, gently re-knead them, and roll them out again to cut out more donuts until all the dough is used. This ensures minimal dough wastage.
- Bake the donuts: Place the baking sheet with the shaped donuts in the preheated oven. Bake for 12-15 minutes, or until the donuts are lightly golden brown and cooked through. The baking time may vary slightly depending on your oven and the size of your donuts. Keep an eye on them and check for doneness around the 12-minute mark. A toothpick inserted into the center of a donut should come out clean when they are done. The donuts should puff up slightly and become light and airy as they bake.
- Cool and decorate (optional): Once baked, remove the donuts from the oven and let them cool on the baking sheet for a few minutes before transferring them to a wire rack to cool completely. Cooling on a wire rack prevents the bottoms of the donuts from becoming soggy. While the donuts are cooling, you can prepare any desired toppings or glazes. These donuts are delicious plain, but they are also fantastic with various toppings. Consider dusting them with powdered sugar, cinnamon sugar, or dipping them in a simple glaze (recipe ideas in the “How to Serve” section). Decorate the donuts while they are still slightly warm, as glazes and toppings adhere better to warm surfaces.
Nutrition
- Serving Size: One Normal Portion
- Calories: 100-150
- Fat: 2-5 grams
- Carbohydrates: 15-20 grams
- Protein: 3-5 grams